
How to Organize Your Garage: A Step-by-Step Guide That Actually Lasts
If your garage looks like a storage unit exploded, you are not alone. The plan was always to keep it for the car, but box by box it filled up until parking inside became a distant memory. Learning how to organize your garage is not about buying the fanciest shelving system. It is about doing the right steps in the right order: sort and purge first, divide the space into zones, move storage up onto walls and ceilings, and set up a seasonal rotation so the chaos never comes back.
Set aside one full weekend and one willing helper. By Sunday evening you can park inside again.
Key Takeaways
- The secret to how to organize your garage is sequence: sort and purge first, zones second, storage systems last.
- Clear floor space by moving storage vertically — walls and ceilings are your biggest untapped real estate.
- Assign every item a zone based on how often you use it; daily items live at arm height, seasonal items go up high.
- A simple four-pile sorting system makes the purge fast and nearly painless.
- One seasonal rotation per year keeps the garage organized permanently instead of slowly filling back up.
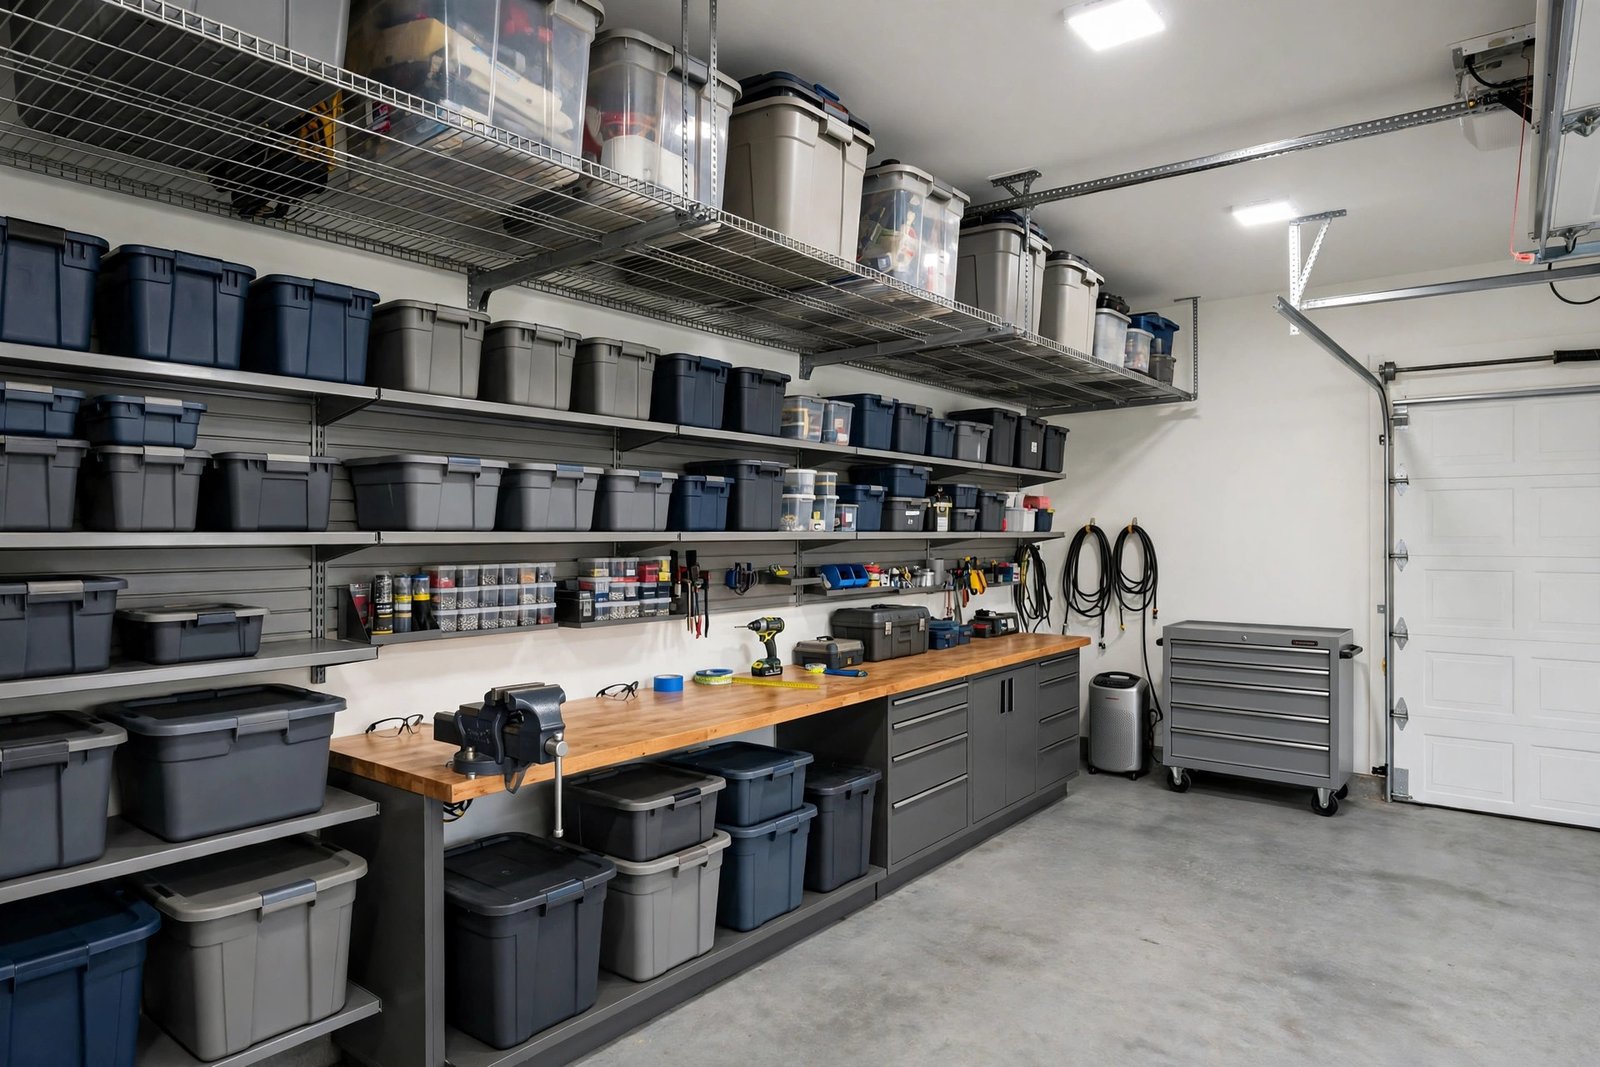
Why Most Garages Become Giant Junk Drawers
The garage is the one room guests never see, so “temporary” boxes can sit untouched for years. Without a system, every new item lands wherever there is floor space and stays there.
The other trap is buying storage before sorting. People invest in beautiful shelving, then fill it with unsorted clutter — organized-looking chaos. The sort comes first and the shelves come later, sized to fit only what you decided to keep. This guide follows that exact order, so nothing you buy goes to waste.
Step 1: The Big Sort and a Ruthless Purge
This is the least glamorous step and the most important one. On a dry day, pull everything out of the garage and onto the driveway — seeing all your belongings in daylight instantly changes your relationship with them.
Use the Four-Pile System
Set up four zones on the driveway: Keep, Donate, Trash, and Relocate. The Relocate pile is for things that belong elsewhere in the house — kitchen gadgets from your last kitchen cabinet organization session that wandered into the garage. Carry them to their real homes before the weekend ends so they do not boomerang back.
Purge Rules That Keep You Honest
- The two-year rule. Not used in two years and not seasonal gear? It leaves — donate, sell, or recycle it.
- The duplicate rule. Keep the best hammer, the best tape measure, one good caulk tube. Pass on the rest.
- The dried-out rule. Crusty paint, solid glue, corroded batteries are not “still good.” Trash them.
- The honest-someday rule. If “someday I’ll fix this” has been true for three years, someday is not coming. Let it go.
The leftover keepers are what you will design storage for — far less than you feared.
Step 2: Divide the Garage Into Zones
With the garage empty and your keepers on the driveway, walk inside and look at the space with fresh eyes. A garage that works is really several small “rooms” sharing one building — and when every item has a zone, you stop hunting for the drill because it lives in the Workshop zone, always.
The Parking Zone
Mark this out first — it gets priority, because the garage was built for cars. Lay painter’s tape where the car’s nose should stop, or hang a tennis ball from the ceiling. Nothing but cars lives here. Defending this boundary is the whole game.
The Workshop Zone
Pick one wall near an outlet and the best light for a workbench. Everything project-related clusters here: hand tools, power tools, fasteners, paint supplies. Keep this zone’s footprint small and disciplined — workshops expand to fill whatever space you give them.
The Household Storage Zone
Bulk paper goods, cleaning supplies, and household overflow live along this wall. Use the same discipline you would when you organize a small closet: clear bins and big readable labels.
The Seasonal and Sports Zone
Camping gear, bikes, lawn equipment, and seasonal decorations belong near the garage door or up on the ceiling. These move in and out in waves, so this zone must be reachable without crossing the parking lane.
Step 3: Take Storage to the Walls
Now the golden rule kicks in: nothing lives on the floor that can live on the wall. Measure your wall zones, list exactly what needs to hang, and only then buy hardware.
Slatwall panels or sturdy pegboard are the most flexible choice for hand tools — hooks and baskets rearrange as your collection changes. Heavy-duty hooks hold the big items: leaf blowers, string trimmers, ladders. For bulk storage along the household wall, freestanding wire shelving is cheap, ventilated, and see-through. Weekly-grab items go at waist to eye level; twice-a-year items go on top. For visual inspiration before you drill, browse these garage storage ideas to see loaded, styled wall setups.
Step 4: Use the Ceiling With Overhead Racks
Steel overhead racks mount to ceiling joists and swallow the bulky, rarely touched items that eat floor space: holiday totes, luggage, coolers, seasonal sports gear.
Install racks over the parking lane or along the back wall, keeping at least seven feet of clearance below, and respect the weight limit — most residential racks handle 250 to 600 pounds, distributed evenly. Use latching, weather-resistant totes, never cardboard, and label each tote on two sides. One caution: the ceiling is for seasonal items only. If you need a ladder to grab the hedge trimmer, you have organized your garage into inconvenience.
Step 5: Set Up a Workbench That Actually Works
A workbench buried in clutter is just an expensive shelf. A working bench needs three things: a clear surface, task lighting, and tools within one step. Position a 24 to 30 inch deep bench against your workshop wall near an outlet, and hang a bright LED shop light above it — garages are notoriously dim.
Let tool storage radiate outward by frequency of use. Daily hand tools go on the pegboard directly above the bench. Power tools and chargers live on a shelf beside it, with a power strip on the bench leg so chargers have a permanent home. Small hardware goes in a labeled wall-mounted parts organizer. Protect the surface with a sacrificial hardboard sheet, and keep one third of the bench permanently clear — a “landing strip” for whatever you are fixing. The moment the whole bench is covered, projects migrate to the floor, and the floor is for cars.
Step 6: The Seasonal Rotation System
This final step separates a garage that stays organized from one that slowly refills. Twice a year — when warm weather arrives and when cold weather arrives — spend one hour rotating. Summer gear swaps positions with winter gear, so whatever the current season needs is always easiest to reach. The rotation doubles as a declutter reminder: broken tent poles get tossed, depleted supplies get noted. An hour twice a year beats another full-weekend purge in five years.
Pro Tips That Make the Whole Project Easier
Label every bin — and the shelf spot too, so anyone putting things away knows where each bin lives.
Keep paint, solvents, and chemicals on shelves, never on the floor. Flammables stay away from heaters and furnaces.
Every new tool or gadget that enters means something old leaves. This habit prevents most future clutter.
You will never open an opaque bin just to check what is inside. Clear bins kill the “mystery box” problem.
Snap photos of the chaos first. On hour six of the purge, they will remind you how far you have come.
Do not clean the empty garage until the purge is done — you will just sweep twice. Save the floor wash for the final hour.
5 Mistakes That Undo a Perfectly Organized Garage
Buying storage before purging. Shelving bought for unsorted clutter just freezes the chaos in place. Sort first; buy only what fits the keepers.
Cardboard boxes as permanent storage. Cardboard is a moving supply, not storage. It collapses, absorbs moisture, and invites pests — transfer keepers into latching plastic totes.
Storing everything at the same priority. When the snow shovel is buried behind beach chairs in October, the system has failed. Match storage height to usage frequency.
No parking protection. Without a taped boundary you defend, “temporary” items creep back within a month. The car is the garage’s first resident.
Skipping the labels. An unlabeled system works for one person for one week. Labels are what let it survive your family — and your future self.
Frequently Asked Questions
How long does it take to organize a garage properly?
A typical two-car garage takes one full weekend for the sort, purge, and zone setup, plus a day for wall storage and overhead racks. Do not rush the sorting step — everything else depends on it.
What is the cheapest way to organize a garage?
The purge is free and does most of the work. After that, secondhand wire shelving, a basic pegboard with hooks, and clear plastic totes from a discount store organize most garages for well under $200.
How do I keep my garage organized long-term?
Defend the parking zone, follow the one-in-one-out rule, and do a one-hour seasonal rotation twice a year. Together they stop the slow refill that undoes most cleanouts.
Is it safe to store paint and chemicals in the garage?
Sealed latex paint and household chemicals are fine on shelves in moderate climates — off the floor and away from furnaces or water heaters. Extreme heat or freezing ruins paint, and solvents or fuel belong in a ventilated spot away from ignition sources.
How do I organize a garage and still park my car inside?
Mark the parking zone first and treat it as sacred. Move all storage to walls, ceiling racks, and the back or side walls outside the car’s footprint.
Your Garage, Reclaimed
Now you know how to organize your garage the professional way: purge ruthlessly, zone deliberately, build upward onto walls and ceilings, and protect the system with a twice-yearly rotation. Pick a weekend and start with the driveway sort.
Want more inspiration for the wall-storage step? Browse our garage storage ideas, and if you are on a labeling streak, carry the momentum inside with our guide on how to organize kitchen cabinets next.
1 thought on “How to Organize Your Garage: A Step-by-Step Guide”