
How to Organize Pots and Pans: Every Method That Actually Works
Pots and pans are the hardest things in the kitchen to organize. They are heavy, bulky, oddly shaped, and they come with lids that never seem to fit anywhere. Stack them in a cabinet and you end up crouching on the floor, lifting a tower of cast iron to reach the one pan at the bottom. The result, in most homes, is a chaotic cabinet that everyone dreads opening — and a set of good pans that get scratched and dented in the daily pile-up.
The fix is not a single product. It is matching the storage method to your kitchen, your pans, and the way you actually cook. A deep drawer suits one kitchen; a hanging rail suits another; a pull-out rack rescues a third. This guide covers every method that genuinely works — cabinet dividers, vertical racks, pull-outs, deep drawers, hanging storage, and lid solutions — plus how to declutter first, protect your cookware, and keep the system working once it is set up.
Key Takeaways
- Declutter before you organize: most kitchens hold pans nobody uses.
- Store lids separately from pots — lids cause most of the chaos.
- Vertical storage (dividers or file-style racks) beats stacking for everyday pans.
- Heavy pans belong low and close to the stove; light pans can go higher.
- Protect nonstick and enamel surfaces with pan protectors or towels between stacked pieces.
- The best system is the one you will actually maintain — pick it for your cooking habits, not a catalogue photo.
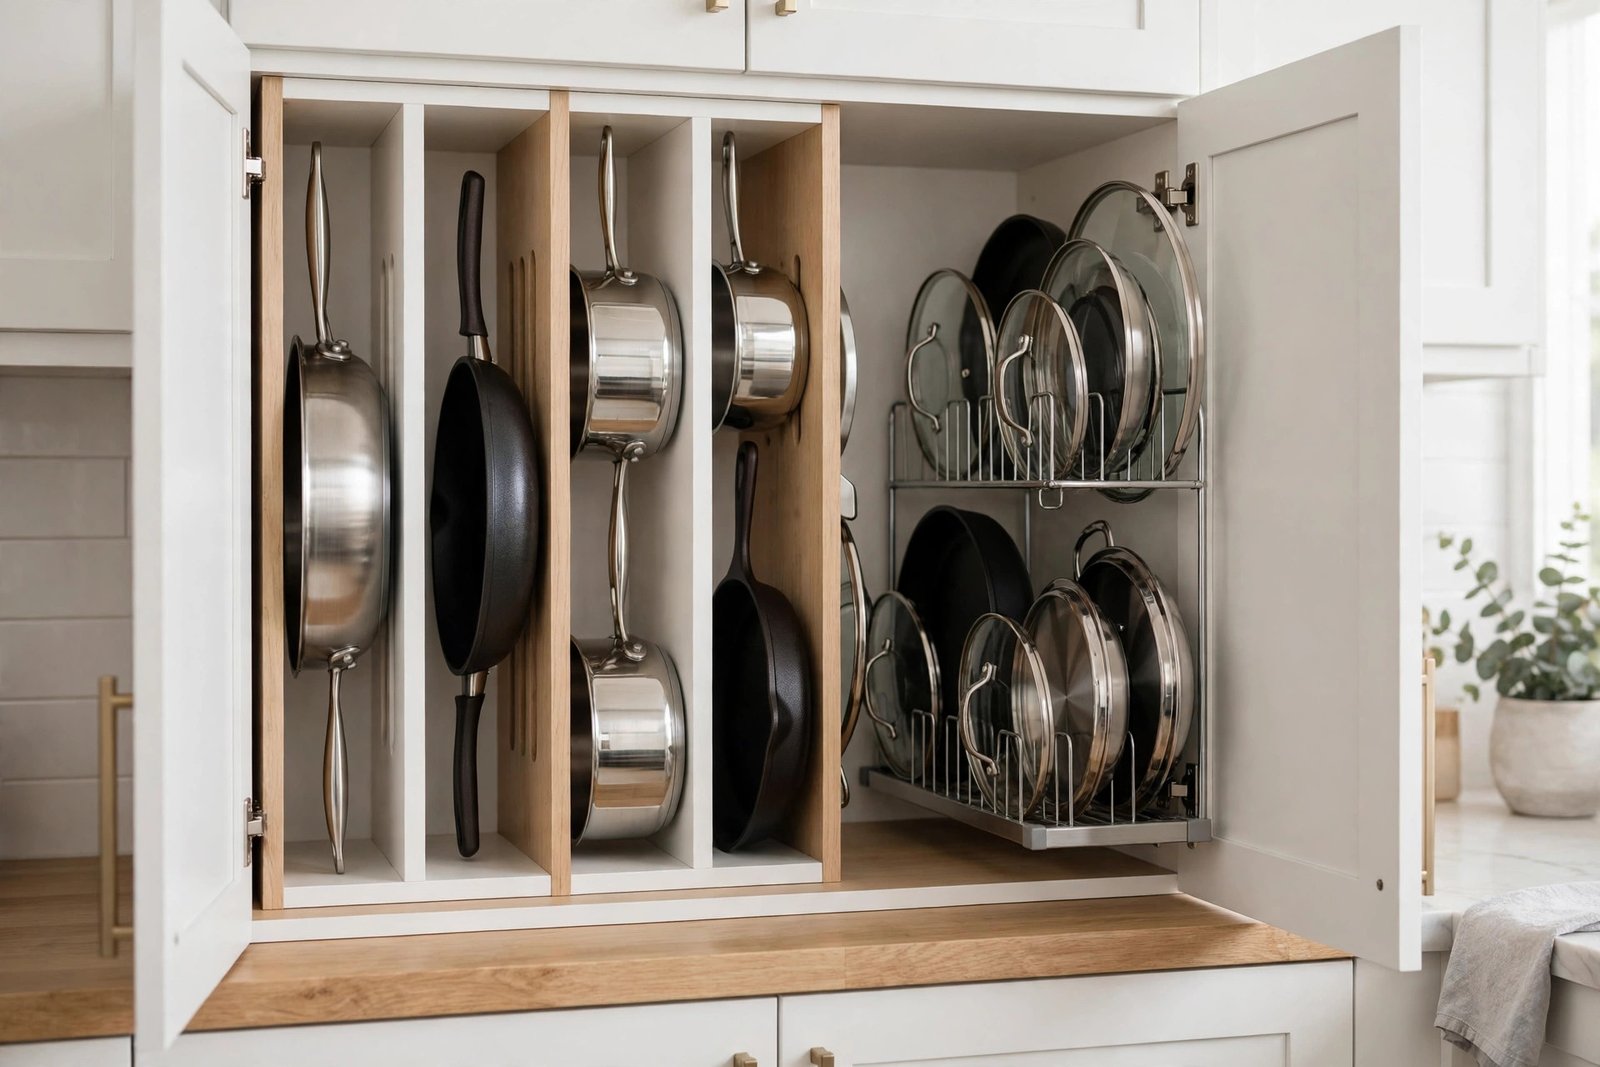
Step 1: Declutter Before You Buy Anything
Every organization project should start with everything out of the cabinet and on the counter. It is the only way to see what you actually own. Most kitchens reveal the same pattern: two or three pans used weekly, a few used monthly, and a collection of strays — a warped baking tray, a saucepan with a loose handle, a novelty pan bought for one recipe, lids whose pots disappeared years ago. Be honest about each piece. If you have not used it in a year, and it is not a seasonal item like a roasting pan you use every holiday, it is a candidate for donation or recycling.
Apply the same honesty to duplicates. Few home cooks need four frying pans of the same size, and keeping them all guarantees a crowded cabinet. Keep the best one or two of each type and let the rest go. Check condition as you sort: warped bases that wobble on the hob, scratched nonstick coatings, loose handles, and lids with broken knobs are not just clutter — they cook badly and, in the case of damaged nonstick, should be replaced.
Step 2: Measure Your Space and Your Pans
Before buying racks or dividers, measure. Cabinet interiors are smaller than they look from outside, and a rack that fits the catalogue photo may not fit your cabinet once the door hinges and the shelf supports are accounted for. Measure the width, depth, and height of each cabinet you plan to use, and note any obstacles: the sink plumbing under the sink cabinet, the drawer slides, the lip at the front of a shelf. Measure your largest pan — diameter and height with its handle — and your tallest pot with its lid on.
This is also the moment to think about the stove: pans stored within a step or two of the hob get used more and put away more willingly than pans stored across the kitchen. If you have a choice, give the everyday pans the cabinet nearest the stove. If your kitchen is small, the same logic applies with more urgency. Small kitchens benefit most from vertical and wall storage, because counter and cabinet space is scarce. Our guide to kitchen storage ideas for small kitchens covers the broader small-kitchen strategies, and many of them — using walls, doors, and dead corners — apply directly to pots and pans.
Method 1: Vertical Dividers and File-Style Racks
Vertical storage is the single biggest improvement most kitchens can make. Instead of stacking pans horizontally, you stand them upright like files in a filing cabinet, separated by dividers or held in a purpose-made rack. To get a pan, you slide it out — no lifting, no unstacking, no avalanche. This works brilliantly in deep base cabinets, where horizontal stacks are at their worst, and it works for both pots and frying pans.
You have two options. Adjustable tension dividers or a vertical pan rack designed for cabinets both work; the rack is sturdier and easier to load, while individual dividers are cheaper and more flexible for odd sizes. Lids get their own treatment — see below — because lids stored with their pots are what turn vertical storage back into a tangle.
Method 2: Pull-Out Racks and Roll-Out Shelves
Pull-out racks solve the deepest problem of base cabinets: the back half, where pans go to disappear. A roll-out shelf or a pull-out pan rack brings the entire contents of the cabinet out to you, so nothing hides at the back and nothing requires kneeling and reaching. This is the best option for deep, dark cabinets, for taller cooks who dislike crouching, and for anyone with back or knee problems.
Pull-outs come in two main forms. A simple roll-out shelf lets you arrange pans on a tray that slides out; a dedicated pan rack adds dividers or hooks to that sliding base. The rack version organizes better, the shelf version is more flexible. Installation is usually straightforward with a drill and a screwdriver, and many renters use freestanding versions that sit inside the cabinet without screws. If you are reorganizing the whole kitchen, pair this with a general tidy-up using our guide to how to organize kitchen cabinets.
Method 3: Deep Drawers
If you have deep drawers — and many modern kitchens do — they are arguably the best pot and pan storage of all. A drawer pulls fully out, everything is visible from above, and you can lift a pan straight up rather than sliding it out of a dark cabinet. Use drawer dividers or a pegboard-style drawer organizer to keep pans from sliding around, and store lids vertically at the side of the drawer or in a separate narrow drawer if you have one.
Check the drawer slides before loading a drawer with a full cast-iron collection, and remember that very tall stockpots may not fit with their lids on — store those lids separately and the problem disappears.
Method 4: Hanging Storage
Hanging pots and pans from a ceiling rack or a wall rail frees an entire cabinet, puts every pan within reach, and looks wonderful in the right kitchen. It suits cooks with a moderate collection of attractive pans, a sturdy ceiling or wall to mount to, and enough headroom that the rack does not become a hazard. It suits less well in small kitchens with low ceilings, in homes with small children who might pull at hanging pans, and in kitchens where the hanging collection would block light or a window.
If you hang, mount into studs or solid masonry — a rack full of pans is heavy, and plasterboard fixings alone will not hold it. Use S-hooks so individual pans lift off easily, and hang the most-used pans at the easiest height. Keep the rail or rack near the stove but not directly above it, where heat and steam will coat the pans in grease. For the wider kitchen picture, see how to organize kitchen drawers, since freeing a cabinet often means rethinking what the drawers hold too.
Solving the Lid Problem
Lids deserve their own section because they cause a disproportionate share of the mess. A lid is flat, round, awkward to stack, and always in the way of the pot it belongs to. The solution is almost always to store lids separately, vertically, in their own rack. Options include a lid rack mounted on the inside of a cabinet door, a vertical lid organizer that sits in a cabinet or drawer, a tension rod arrangement that holds lids upright in a deep drawer, or a simple file organizer repurposed for lids.
Door-mounted lid racks are the most space-efficient: they use dead space on the inside of a cabinet door and keep lids visible and accessible. Measure the door and the lid diameters first, and make sure the rack does not prevent the door from closing. For glass lids, handle them with care in any rack — they chip if knocked together, so give each lid its own slot rather than stacking them. Once lids have their own home, the pot cabinet immediately becomes calmer, because the pots themselves stack or file far more neatly without lids sliding around on top of them.
Protecting Your Pans and Keeping the System Working
Soft protectors or a folded tea towel between stacked pans prevent scratches on nonstick, enamel, and polished surfaces.
Only nest pans of the same material and similar size, and never force a tight nest — stuck pans dent and scratch each other.
Every new pan means an old one leaves. This single rule prevents the slow re-accumulation that ruins most systems.
Damp pans stored in a closed cabinet develop odours and, for cast iron, rust. Dry thoroughly before putting away.
Label nothing — just be consistent. A pan that always lives in the same slot is a pan that gets put away.
Every six months, pull everything out and check: anything unused, damaged, or duplicated goes. Ten minutes keeps the system honest.
Storage also affects how long your pans last. Stacking heavy cast iron on nonstick scratches the coating; storing a wet pan in a closed cabinet invites rust; jamming a pan into a too-small space bends handles over time. The organization system is also a care system, and the small habits — protectors between pans, dry before storing, a consistent home for each piece — pay off in pans that cook well for years longer. If the pan cabinet is overflowing because the pantry has spilled into it, fix the pantry first — our guide to how to organize a pantry is a good starting point.
Frequently Asked Questions
What is the best way to organize pots and pans in a small kitchen?
Use vertical storage in cabinets, store lids separately on a door-mounted rack, and consider a wall rail for everyday pans. In small kitchens, using walls and cabinet doors matters more than buying more cabinets.
Should pots and pans be stored with their lids on?
Usually not. Lids stored separately, vertically in their own rack, take up less space and make pots far easier to stack or file. The exception is a single pot kept on the hob, where keeping its lid on top is convenient.
Is it OK to stack pots and pans?
Yes, if you protect them. Use pan protectors or tea towels between pieces, nest only similar sizes, and keep the heaviest pan at the bottom. For everyday pans, though, vertical storage is more convenient than stacking.
How do I organize pots and pans without a deep drawer?
Use a vertical divider rack or a pull-out rack in a base cabinet. Both bring order to deep cabinets without a drawer, and both let you reach a pan without unstacking the whole pile.
Where should heavy cast iron pans be stored?
Low, close to the stove, and on the sturdiest storage you have — a reinforced cabinet shelf, a strong pull-out, or a wall rail mounted into studs. Avoid high shelves, where lifting heavy iron overhead is awkward and unsafe.
Start With the Declutter This Weekend
You do not need to buy a single rack to make progress. Pull everything out, keep what you actually cook with, and give the lids their own spot — even a temporary one, like a dish rack inside a cabinet. That alone will transform the cabinet. Then choose one method for the pots themselves: vertical dividers for a base cabinet, a pull-out for a deep cabinet, a rail for the wall, or dividers for a deep drawer.
Cooking should start with reaching for a pan, not wrestling with a pile. A kitchen where every pot has a home, every lid has a slot, and the everyday pans are a step from the stove is a kitchen that is simply more pleasant to cook in — and one that stays organized, because putting things away is finally easier than leaving them out.