
How to Improve Home Insulation, Room by Room
Two homes can have the same heating system and very different bills — and the difference is almost always insulation. Good insulation keeps warmth inside in winter, keeps heat out in summer, and makes every room feel evenly comfortable instead of draughty near the windows and cold underfoot. The bad news is that many homes, especially those built before modern energy codes, have far less insulation than they need. The good news is that improving it is one of the most rewarding home projects you can take on, and much of it is straightforward.
This guide explains how to improve home insulation in the attic, walls, and floors, how to choose between fibreglass, cellulose, mineral wool, and foam, when to do it yourself and when to hire a professional, and how to draught-proof without trapping moisture. Costs are typical ranges for an average three-bedroom home, so you can plan the work in the order that gives you the most comfort per dollar.
Key Takeaways
- Insulate in this order: attic first, then floors over unheated spaces, then walls — that is where heat loss is greatest.
- Air sealing comes before insulation; insulation laid over leaks still lets warm air escape around it.
- Blown-in cellulose or fibreglass is usually best for attics, while rigid foam suits walls and floors where space is tight.
- Draught-proofing is cheap and immediate, but a home must still breathe — never block extractor fans or trickle vents.
- Watch for moisture: insulation must stay dry, with vapour control on the warm side in cold climates.
First, Find Out What You Already Have
Before buying a single batt, check what is already in place. In the attic, lift a corner of the existing insulation and measure its depth with a tape measure, noting whether it is batts, loose fill, or a mix. Less than 10 inches of fibreglass or cellulose usually means you are below the recommended R-38 to R-49 for most climates. Look for gaps, compressed patches under stored boxes, and bare spots around the eaves — those are exactly where heat escapes fastest.
For walls, remove a switch plate on an exterior wall (with the power off) and look into the gap around the electrical box; you may see insulation or an empty cavity. Homes built before the 1970s often have none at all. A thermal imaging survey, often included in a $300 to $500 energy audit, shows cold patches clearly. Also check floors: bare joists above a crawl space or unheated garage mean uninsulated floors.
Understanding R-Values Without the Jargon
Insulation is rated by R-value, which measures resistance to heat flow: the higher the number, the better the insulation. Different materials achieve different R-values per inch, which is why thickness alone does not tell the whole story. Fibreglass batts provide about R-3.2 per inch, cellulose about R-3.7, mineral wool about R-3.6, and closed-cell spray foam about R-6.5 — the highest per inch, which is why it is used where space is tight, such as cathedral ceilings or thin walls.
As a practical guide, aim for R-38 to R-60 in the attic, R-13 to R-21 in walls, and R-25 to R-30 in floors over unconditioned spaces. Going from R-11 to R-38 in an attic delivers far more saving than going from R-38 to R-60. Insulation only works when it is continuous and in full contact with the surface it protects — a batt with a two-inch gap beside it can lose half its rated performance.
Attic Insulation: Step by Step
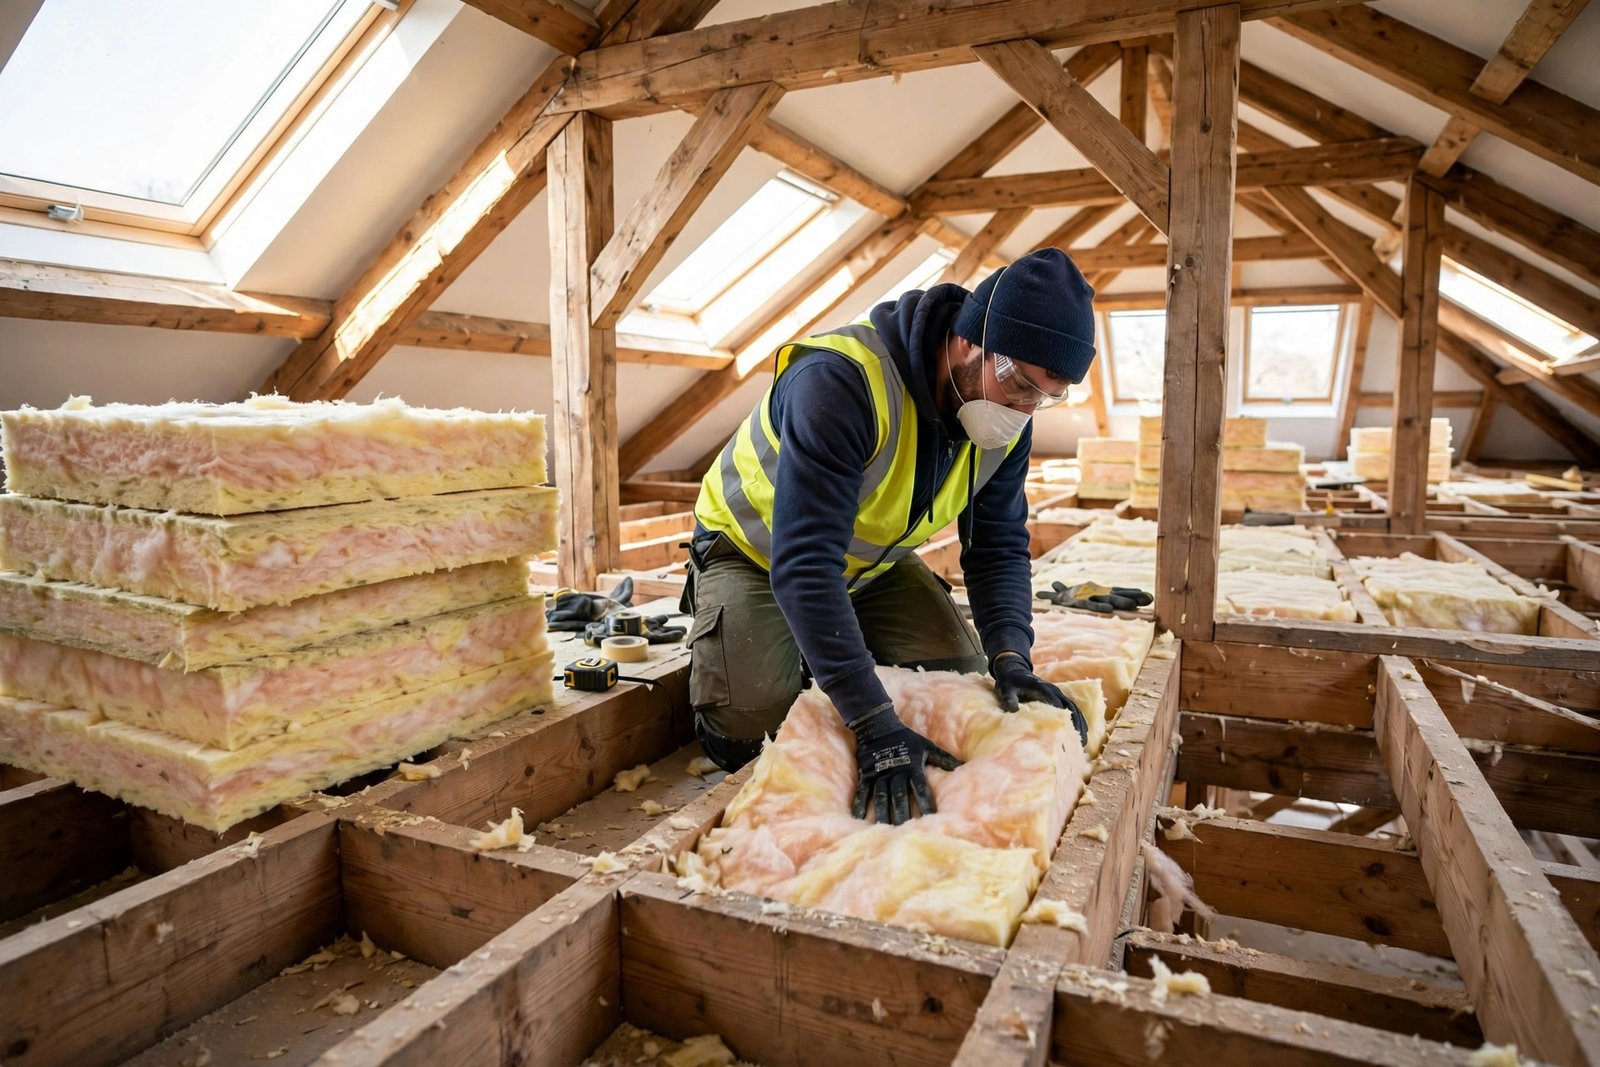
The attic is the best place to start because it is accessible, relatively cheap, and delivers the largest saving. Begin by air sealing: from inside the attic, seal every penetration through the ceiling below — wiring holes, plumbing vents, recessed light housings, and the tops of interior walls — with caulk or expanding foam. Keep insulation at least three inches away from recessed lights unless they are rated insulation-contact, and keep it clear of hot flues and chimneys, using metal flashing and fire-rated sealant there.
Next, check ventilation: soffit vents and ridge or gable vents must stay clear. Install rafter baffles at each eave bay before adding insulation, so the new material does not block the soffit vents. Then add blown-in cellulose or fibreglass to a depth of 12 to 16 inches — it fills gaps and covers joists completely. Professional blown-in attic insulation costs $1,500 to $3,500; a DIY rental blower can cut that roughly in half.
If you prefer batts, lay them perpendicular to the joists in a second layer over any existing insulation, taking care not to compress them — compressed insulation loses R-value. Never lay a vapour barrier over existing insulation in a way that traps moisture between layers; in most climates, the vapour retarder belongs on the warm side, which is the ceiling below. Finally, insulate the attic hatch or pull-down stairs, which are often the single leakiest spot: a foam hatch cover or an insulated stair box costs $50 to $150 and stops a surprising amount of heat loss.
Wall Insulation: The Bigger Job
Wall insulation is more disruptive than attic work, but for homes with empty cavities it changes comfort dramatically — rooms stop feeling cold near exterior walls, and draughts that no amount of caulking fixed finally disappear. The standard method for existing homes is blown-in insulation: a contractor drills small holes, typically two inches wide, in each wall bay from inside or outside, blows in dense-pack cellulose or fibreglass, then plugs and patches the holes. Costs run $2,000 to $5,000 for an average home, and a good crew finishes in one to two days with minimal mess.
For solid masonry walls with no cavity, internal insulation (2 to 4 inches of rigid foam or insulated plasterboard, $5,000 to $12,000) eats into room space, while external insulation (4 to 6 inches of foam or mineral wool with render, $10,000 to $25,000) does not disturb the interior but transforms the appearance. Both are best planned alongside redecoration. If your walls already have thin insulation, spend on the attic and draught-proofing first, where the return is faster.
Spray foam seals and insulates in one step and suits irregular cavities and rim joists, but it is not a DIY job and makes future rewiring harder. For most existing walls, blown-in cellulose is the better value.
Floor Insulation and Draught-Proofing
Cold floors are the complaint homeowners notice most in winter, and the fix is usually simple. For suspended timber floors over a crawl space, insulation batts or rigid foam fitted snugly between the joists from below, held with netting or batt supports, cost $1,000 to $2,500 and make ground-floor rooms noticeably warmer. From above, the job is more disruptive — it means lifting floorboards — so it is best combined with a planned floor replacement. For concrete slab floors, insulation can only be added on top, usually as rigid foam beneath a new floor finish, which raises floor height by 1 to 2 inches and affects door clearances.
Draught-proofing is the cheapest job of all: weatherstrip exterior doors, fit door sweeps, caulk window frames, and add foam gaskets behind outlet plates on exterior walls. It costs $200 to $500 and can save 5 to 10 percent on heating. Never seal window ventilation slots, block extractor fans, or draught-proof a room with a gas fire without ensuring its required air supply — a house that cannot breathe grows damp and mouldy.
Choosing the Right Material for Each Job
Each insulation material has a sweet spot. Fibreglass batts are cheap, widely available, and easy for DIY attic and floor work, but they must be cut precisely and kept dry — a batt with gaps performs far below its rating. Cellulose, made from recycled paper treated with borate fire retardant, is the best blown-in choice for attics and walls, fills irregular spaces superbly, and has good soundproofing, but it settles slightly over time and must not get wet. Mineral wool (rockwool) handles high temperatures, resists fire, and is excellent for soundproofing between rooms and around flues, though it costs more than fibreglass. Rigid foam boards (polyisocyanurate or extruded polystyrene) give the highest R-value in thin spaces and are ideal for basement walls, exterior sheathing, and under-slab work, but they must be covered with a fire-rated finish indoors and are not recyclable in most areas.
Moisture is the enemy of every one of these materials: wet insulation loses most of its R-value and grows mould, so fix leaks and condensation before insulating. In cold climates, a vapour retarder belongs on the warm (interior) side; in hot, humid climates, it belongs on the exterior. Ask your contractor to explain the vapour strategy for your wall build-up before work starts.
DIY vs Professional: Where to Draw the Line
Attic batts, hatch insulation, door and window draught-proofing, outlet gaskets, and pipe insulation. Wear a mask, gloves, and eye protection, and work on boards, never on ceiling plasterboard.
Blown-in attic insulation with a rented machine. It is doable in a weekend, but you need a helper, good lighting, and a clear plan for vent baffles and air sealing first.
Wall injection, spray foam, external wall insulation, and any work in tight, hot, or vermiculite-containing attics. Old vermiculite may contain asbestos — test before disturbing it.
Any home with damp, mould, or a history of roof leaks should be inspected before insulation. Insulating a damp wall traps the problem and makes it worse.
On safety: attic work in summer can reach dangerous temperatures, so work early, take water, and wear a properly fitted respirator. Never bury junction boxes under insulation, and keep insulation away from non-rated recessed lights and hot flues.
How Much Will It Cost, and What Will You Save?
For a typical three-bedroom home: attic top-up $1,500 to $3,500, floor insulation $1,000 to $2,500, draught-proofing $200 to $500, and wall injection $2,000 to $5,000 — roughly $4,700 to $11,500 together, saving 20 to 30 percent of heating and cooling costs. The attic pays back in three to seven years; walls take seven to fifteen. Check for rebates first — they can cover 30 percent or more.
Keep perspective on the numbers. Insulation does not pay back like a savings account; it pays back in lower bills, warmer rooms, quieter nights, and a home that is easier to sell. Homebuyers increasingly ask about energy performance, and a well-insulated home with a documented upgrade history photographs and appraises better than one with cold walls and a draughty hall. Pair insulation with a smart thermostat and regular heating maintenance — our guide to installing laminate flooring is useful reading if new floors are part of your insulation plan — and you have a home that is comfortable in every season, not just on the day the work is finished. For the wider picture on heating costs, see our winter thermostat guide and our home maintenance checklist, which keeps insulation, filters, and draught seals in good shape year after year.
Frequently Asked Questions
How do I know if my home needs more insulation?
Measure your attic depth — less than 10 inches of fibreglass or cellulose usually means you are under-insulated. Cold walls, draughty rooms, ice dams on the roof edge in winter, and high heating bills are all signs. A professional energy audit with thermal imaging gives a definitive answer.
What is the best insulation for an attic?
Blown-in cellulose or fibreglass is usually best because it fills gaps and covers joists completely. Fibreglass batts work well too if laid carefully in two perpendicular layers, but they must not be compressed or gapped.
Can I insulate my walls without removing plasterboard?
Yes, in most cavity-wall homes. A contractor drills small holes in each wall bay, blows in dense-pack cellulose or fibreglass, and patches the holes. The work usually takes one to two days and costs $2,000 to $5,000 for an average home.
Does draught-proofing cause damp?
It can if ventilation is blocked. Never seal extractor fans, trickle vents, or air supplies to gas appliances. Draught-proof doors, windows, and loft hatches, but keep controlled ventilation working — that is the difference between a warm home and a damp one.
Is spray foam better than fibreglass?
Spray foam insulates and air-seals in one step and gives a higher R-value per inch, making it ideal for tight spaces and complex rooflines. For standard attics and walls, blown-in cellulose or fibreglass usually offers better value, and it is easier to remove later if wiring or plumbing needs access.
Your First Three Steps This Week
Start small: measure your attic insulation depth, seal obvious draughts around doors and windows, and insulate your attic hatch. Those three jobs take a weekend and cost under $200.
Then get a quote for the bigger job — usually an attic top-up or wall injection — and check for rebates before you book. A warmer, quieter, cheaper-to-run home starts with what is hidden in your walls, floors, and roof.
1 thought on “How to Improve Home Insulation, Room by Room”