
Easy Rangoli Designs for Diwali Beginners
Rangoli looks intimidating until you realise that almost every beautiful design starts with dots. A grid of dots, joined with curves and filled with colour, is how beginners have learned for generations — and it is how you can make a genuinely lovely rangoli this Diwali, even if you have never drawn one before. With Lakshmi Puja falling on Sunday, November 8, 2026, you have time to practise once or twice before the festival, and a practice run makes all the difference.
This guide covers the easiest designs first, then builds up gently: dotted flowers, diya patterns, and simple geometric borders. You need very little — rangoli powder or coloured rice, a piece of chalk, and a flat surface — and every design here can be finished in under an hour.
Key Takeaways
- Start with a dot grid: dots keep your lines even and your design symmetrical.
- Use only two or three colours for your first rangoli — restraint looks neater than a rainbow.
- White outlines make colours pop and hide wobbly edges.
- Practise on newspaper or a tray before drawing at the entrance.
- Finish with diyas or flower petals around the edge for instant polish.
Before You Start: Materials and Prep
Keep it simple. White rangoli powder for outlines, two or three bright colours (pink, yellow, and green are a classic beginner trio), and a small bowl or spoon for pouring. If you buy a readymade stencil or sticker rangoli, there is no shame in it — use it as a base and add your own dots and petals around it to make it personal. Sweep and mop the area first; rangoli powder grips a clean, slightly damp floor far better than a dusty one. Mark the centre with a chalk dot and work outward, so the design stays centred in front of the door.
Choose your spot wisely. The entrance is traditional, but a sheltered balcony or a covered porch keeps the design safe from wind and foot traffic. If rain is forecast, draw inside the doorway instead — a rangoli that survives the evening beats a grand one that washes away. For entrance styling that frames your rangoli beautifully, see our home entrance decor ideas, and pair the design with a toran above the door for a complete welcome.
Design 1: The Simple Dotted Flower
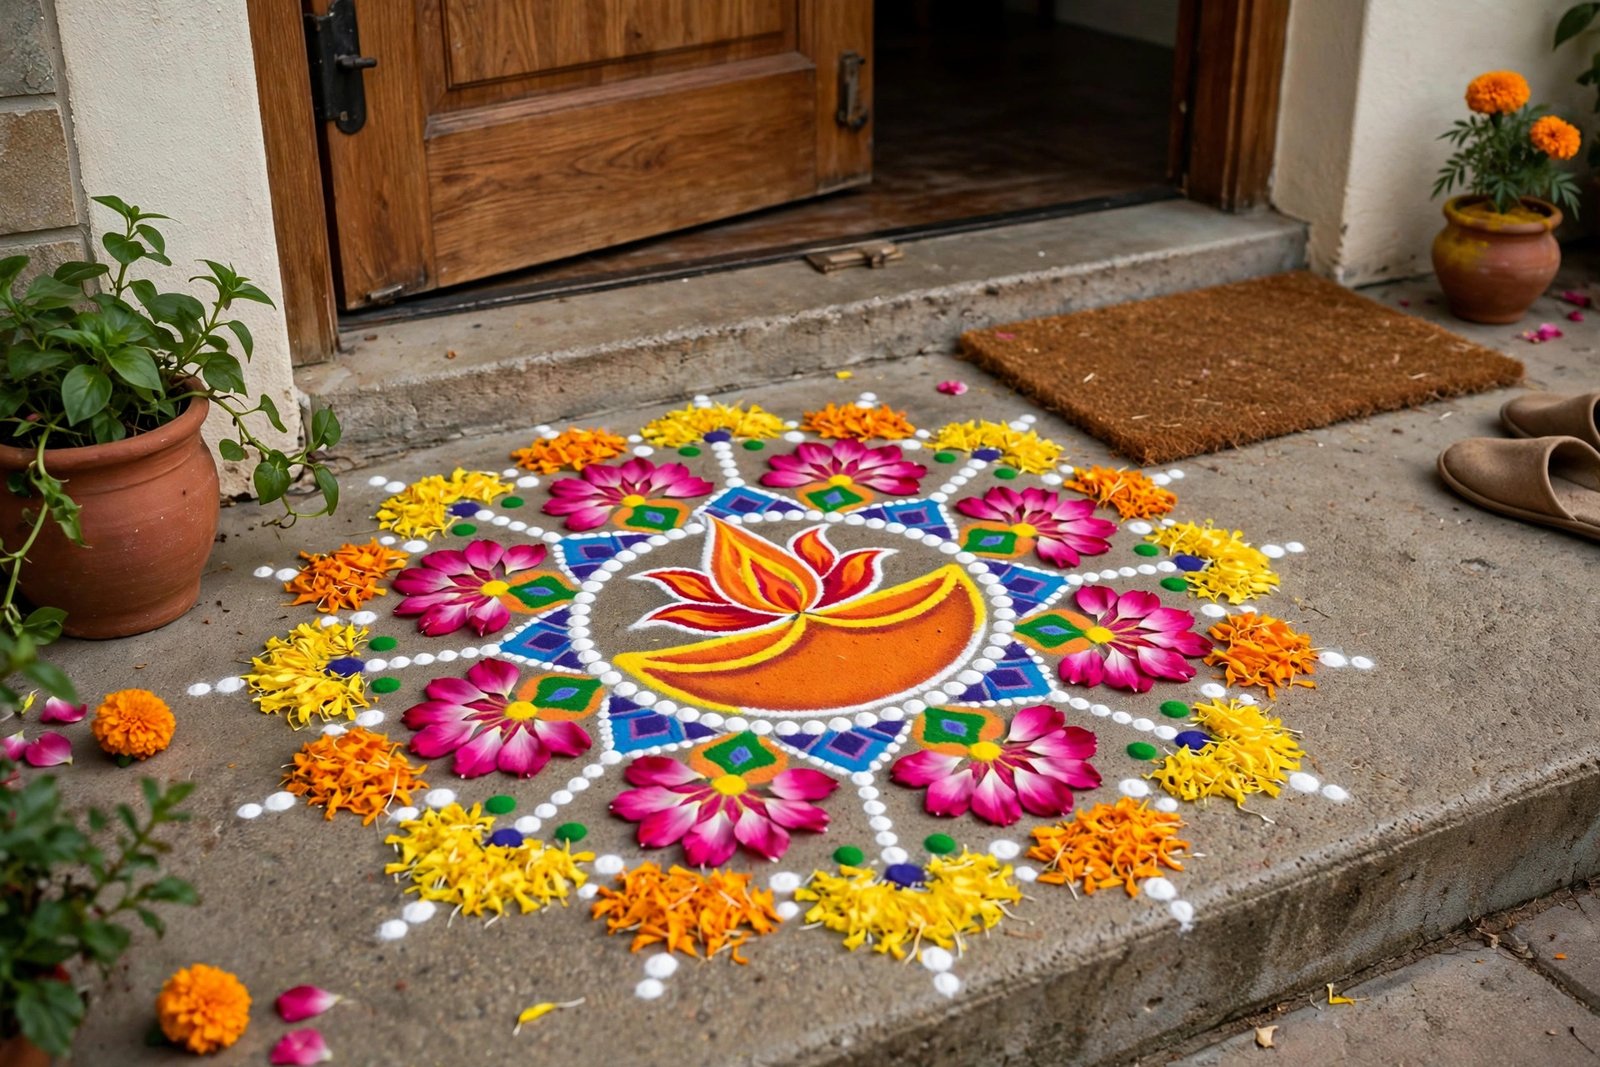
This is the design to learn first. Draw a grid of dots — five rows of five, evenly spaced — in chalk. Join the outer dots with gentle curves to form petals around a centre dot, then join the inner dots into a smaller flower. Fill the outer petals with pink, the inner flower with yellow, and outline everything in white. Add a ring of dots around the outside and you are done. It looks intricate; it is mostly joining dots.
Variations are easy once you have the method. Make the grid larger (7 by 7) for a bigger entrance, change petal shapes from round to pointed, or add a second flower beside the first for a wider doorway. Children love this one — give them the outer ring of dots to fill while you handle the centre.
Design 2: The Diya Pattern
A diya rangoli suits Diwali perfectly and is wonderfully forgiving. Draw a large diya shape — a shallow bowl with a curved base and a flame on top — in the centre of your space. Fill the bowl with orange or red, the flame with yellow and orange, and surround it with small dots or tiny flowers. Place real diyas at the corners of the design in the evening, and the drawing and the flames echo each other beautifully.
For a border, repeat small diyas along the edge of the doorway or draw a simple chain of dots and petals framing the main design. This pattern photographs beautifully and is a favourite for first-timers because even a slightly uneven diya still reads clearly as a diya.
Design 3: The Flower Mandala
A mandala sounds advanced, but a simple one is just circles and petals. Draw a centre dot, a circle around it, then a ring of petals (small arcs), then another circle, then a ring of dots. Fill alternate rings with different colours — yellow centre, pink petals, green outer ring — and outline each ring in white. The symmetry does the visual work for you.
If freehand circles scare you, use a plate or a thali as a guide: trace around it lightly in chalk, then fill in. A mandala pairs beautifully with a brass urli or a bowl of floating flowers placed in the centre — the rangoli becomes a frame rather than the whole display. For handmade festival craft inspiration, our handmade decoration ideas show how simple, hand-finished pieces often outshine shop-bought ones.
Design 4: Geometric Borders and Corner Motifs
Not every rangoli needs to be a centrepiece. A border along the edge of the entrance — a zigzag, a chain of small diamonds, or a row of tiny flowers — frames the doorway elegantly and takes twenty minutes. Corner motifs are even simpler: a small flower or paisley in each corner of the porch, connected by a dotted line, looks deliberate and finished.
Borders are also the best fix for a design that went wrong. If your main rangoli is uneven on one side, a border draws the eye outward and balances it. And if you are truly short on time, a border plus four diyas is a complete, respectable entrance — nobody will know it was plan B.
Colour Tips for Neat, Bright Rangoli
Colour discipline is what separates a tidy rangoli from a messy one. Pick a palette before you start — white plus two colours is ideal for beginners — and keep each colour inside its own outline. Fill large areas first, then add white outlines last; the white covers any colour that strayed over the line. If a section goes badly wrong, sweep just that patch away with a dry cloth and redo it — rangoli is forgiving in a way paint never is.
For extra brightness, add flower petals (marigold and rose) on top of the powder in the centre and at the corners. Petals catch the light and the eye, and they hide small imperfections. Avoid very dark colours on a dark floor; on light tiles, almost any bright colour works. And keep spare powder in small bowls beside you so you are not walking across the design to refill.
Common Beginner Mistakes (and Easy Fixes)
Uneven dots are the most common problem — fix them by marking the grid in chalk first and checking spacing before you pour. Lines that get too thick usually mean you are pouring too fast; slow down and let the powder fall. Colours that bleed into each other happen when outlines are missing; a white line between two colours solves it instantly. And if the whole design feels off-centre, add a border on the shorter side to rebalance it visually.
Finally, protect your work. Ask family to step around it, keep pets indoors until it is photographed, and place diyas just outside the design rather than on it. A rangoli that survives until the evening puja — and the family photos — is a success, however simple it is. For more festive room-by-room inspiration, our DIY home decor ideas share the same handmade spirit, and our DIY decor guide covers simple crafts that pair well with a rangoli entrance.
Frequently Asked Questions
How long does a beginner rangoli take?
A simple dotted flower or diya design takes 30–60 minutes. Borders take about 20 minutes. Give yourself an extra half hour the first time for practice and fixes.
What if I have no rangoli powder?
Coloured rice, chalk powder mixed with food colour, or even flower petals arranged in a pattern all work. A petal-only rangoli is beautiful and completely beginner-proof.
How do I keep rangoli from smudging?
Draw it in a sheltered spot, keep foot traffic to one side, and place diyas outside the design. A light sprinkle of water before drawing helps powder grip the floor.
Can children help with rangoli?
Absolutely — filling dots, placing petals, and pouring a single colour are perfect jobs for children, and they love being part of the festival preparation.
Your first rangoli does not need to be perfect. It needs to be yours: dots joined patiently, colours you chose, and a doorway that says welcome. Practise once, keep the palette simple, and on Lakshmi Puja evening your entrance will glow — powder, petals, diyas and all.