
How to Change Your HVAC Air Filter: A Step-by-Step Guide for Beginners
Changing your HVAC air filter is the easiest maintenance job in your home, and one of the most consequential. The filter catches dust, pollen, pet hair, and other particles before they reach the blower and coils. When it clogs, airflow drops, the system works harder, rooms heat and cool unevenly, and dust bypasses the filter. When it is clean, the system breathes freely, air quality improves, and equipment lasts longer.
Yet many homeowners have never actually done it, because they are not sure where the filter lives, what size to buy, or which way it goes in. This guide removes all of that guesswork. You will learn exactly where to find your filter, how to read its size, what MERV ratings mean, how to swap it safely in about ten minutes, and how to troubleshoot the problems that commonly appear after a change. No tools beyond a flashlight and possibly a screwdriver are required, and no experience is assumed.
Key Takeaways
- Always turn the system off at the thermostat before opening the filter compartment.
- Find the filter in the return-air slot, the furnace cabinet, or behind a return vent grille.
- Read the size printed on the old filter’s frame — never guess, and never force a wrong size.
- Install the new filter with its airflow arrow pointing toward the furnace or air handler.
- Match the MERV rating to your system: most homes do best with MERV 8 to 13.
- Never run the system without a filter, even briefly, unless a technician tells you to.
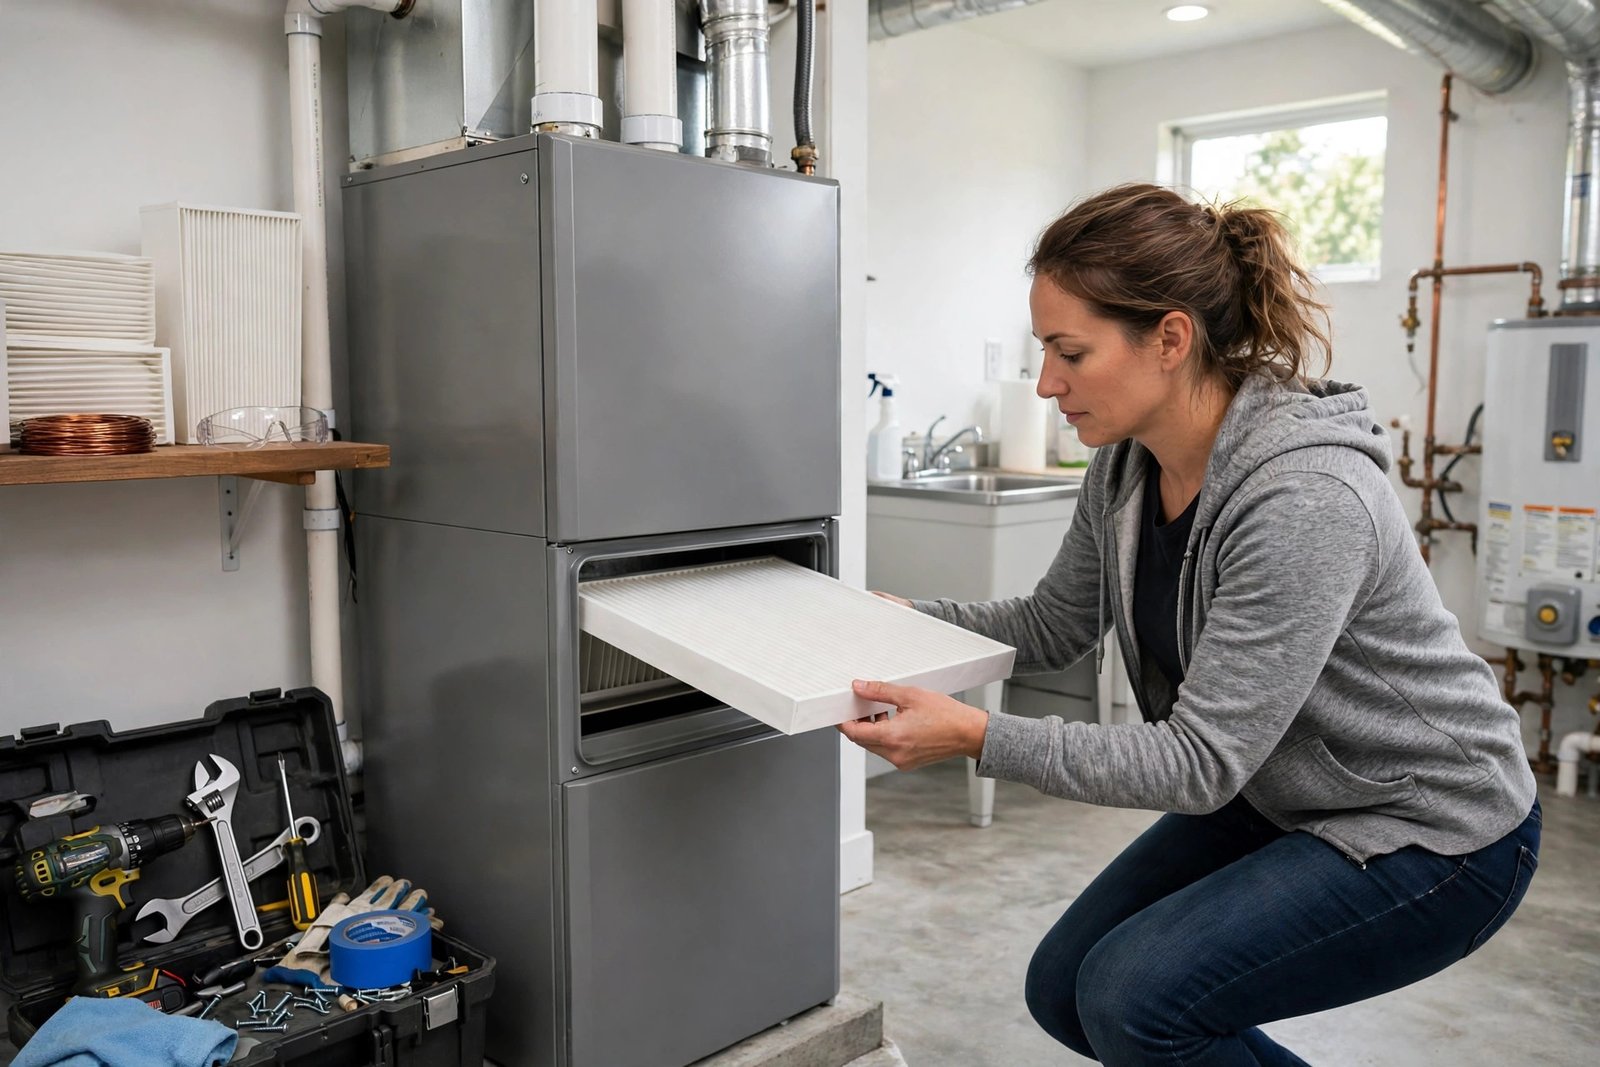
Before You Start: Safety and What You Need
Start by turning the system off. Set the thermostat to off, not just to a temperature it will not reach, so the blower cannot start while the compartment is open — a running blower can pull a loose filter in or blow dust into your face. If the furnace has its own power switch, turn that off too.
Gather a flashlight, a vacuum or damp cloth for the slot, a trash bag for the old filter, and your replacement. A screwdriver is sometimes needed for a screwed-shut grille or door, but most compartments open by hand. If you have allergies, wear a dust mask and gloves — a dirty filter holds exactly the particles you want out of your lungs. Never reach beyond the filter slot: the blower fan, burners, and electrics inside are not homeowner-serviceable.
One safety note matters most: if you smell gas, see water pooling around the unit, notice scorch marks, or hear grinding or buzzing, stop and call a technician. A filter change will not fix those problems, and opening panels beyond the filter door can be dangerous. If you are unsure what the parts are called, our explainers on what HVAC stands for and what HVAC is will help.
Step 1: Find Your Filter
Filters live in one of three places, and finding yours is usually a two-minute hunt. First, check the return-air duct near the furnace: many systems have a filter slot where the duct enters the unit, covered by a metal door or a simple slot. Second, check inside the furnace cabinet behind the lower front panel — the filter often slides into rails beside the blower. Third, check behind a return vent grille elsewhere in the house; homes with the air handler in an attic or crawl space often put the filter there for easy access.
The filter always sits on the return side, where air is drawn into the system — never on the supply side where conditioned air blows out. If you have multiple return vents, check every grille, since there may be a filter behind each one. In apartments, the filter is often behind a hallway return grille or inside a closet unit. If you still cannot find it, the unit’s manual or rating label will show the location.
Before forcing anything, note how the compartment opens: some doors lift off hooks, some slide sideways, some are held by thumb screws. Forcing a stuck cover can bend the duct or break a clip. Check for a hidden screw or latch first, and take a phone photo of the open compartment before removing the old filter for reference.
Step 2: Read the Size and Choose the Right Replacement
Pull the old filter out slowly and read the size printed on its cardboard frame — for example 16x25x1, 20x25x1, or 20x20x4, meaning length by width by thickness in inches. That printed nominal size is the size you buy; it already accounts for the small gap between filter and slot. If the print is worn away, measure the slot and buy the closest standard size that slides in snugly, without bowing or edge gaps.
Thickness matters more than most people realize. A one-inch slot cannot take a four-inch filter, and a four-inch slot fitted with a one-inch filter leaves gaps that let unfiltered air bypass it. Buy the thickness your system was designed for, even if thicker filters look more impressive. Never cut a filter down, and never jam an oversized one in — a bowed filter leaks at the edges and can be pulled into the blower.
Now choose the filter type. Flat fiberglass filters are cheap and catch large dust, but do little for allergies. Pleated filters, with their folded surface area, catch far more fine particles and are the best default for most homes. Washable filters need thorough cleaning and drying — a damp one put back too soon can grow mold — so for most households a disposable pleated filter is simplest. Buy two or three at once so the next change is already on the shelf.
Step 3: Understand MERV Ratings Before You Buy
MERV (Minimum Efficiency Reporting Value) rates how effectively a filter captures particles, on a scale of 1 to 16 for residential filters. MERV 1–4 catches large dust and lint; 5–8 adds mold spores, dust-mite debris, and pet dander; 9–12 captures finer dust and most pollen; 13–16 captures bacteria, smoke, and the finest allergens. Higher sounds better — but only up to the point your system can handle.
Here is the trade-off: a denser, higher-MERV filter restricts airflow more. An older system designed for MERV 8 can struggle with MERV 16, running longer, cooling less effectively, and in extreme cases freezing the evaporator coil or overheating the furnace. The right rating is the highest your system is rated for, not the highest on the shelf. Most homes do very well with MERV 8 to 11; allergy or pet households often step up to MERV 13 if the manual allows it. Check the manual or the filter-door label for a maximum rating before upgrading.
Do not confuse MERV with marketing terms like “allergen defense” — those are not standardized ratings. Compare the MERV number (or the related MPR/FPR scales some brands use). If you upgrade significantly, watch the system for a week: weak vent airflow, longer run times, or ice on refrigerant lines mean the filter is too restrictive — drop back a level. Regular filter care is part of the routine in our HVAC maintenance guide.
Step 4: Install the New Filter and Restart the System
- Turn the system off. Set the thermostat to off and, if present, switch off the furnace power switch. Confirm the blower is not running before you open the compartment.
- Remove the old filter. Slide it out slowly, keeping the dirty side facing up, and place it straight into a trash bag. Dust that shakes loose now goes in the bag, not into your home.
- Clean the slot. Vacuum loose dust from the rails and the compartment edges, and wipe the grille if the filter sits behind one. Do not reach past the slot into the unit.
- Check the airflow arrow. Every pleated filter has an arrow printed on its frame. That arrow must point toward the furnace or air handler — in the direction air flows into the unit, not out toward the room.
- Slide the new filter in. Push it fully into the rails so it sits flat, with no gaps at the edges and no bowing. Replace the cover or grille and fasten any clips or screws.
- Restart and check. Turn the system back on and let it run for a few minutes. Check that air flows normally from the supply vents and that there is no whistling, rattling, or new noise from the filter compartment.
The arrow direction is the mistake almost everyone makes once. The arrow shows airflow direction, not insertion direction: if the filter slides in from the side, the arrow points sideways toward the unit; if from below, it points up. Remember the rule — the arrow points toward the blower and furnace, away from the room air being drawn in. A backwards filter works poorly and can collapse into the duct over time.
After restarting, check airflow at a supply vent. It should feel steady and about as strong as before — often slightly stronger, since a clogged filter was choking it. A loud whistle usually means the filter is not fully seated or the cover is not closed; switch off, reseat it, and try again. If airflow is dramatically weaker than with the old filter, the MERV rating may be too high — drop back a level.
Troubleshooting Common Problems After a Change
Usually a loose cover or a filter not fully seated. Switch off, reseat the filter flat in its rails, and close the cover firmly.
The MERV rating may be too high for your system. Try one level lower and check the manual’s maximum rating.
Check for a condensate leak or drain blockage. Do not reinstall a wet filter — call a technician if water returns.
The filter is undersized, backwards, or too weak for the airflow. Replace it with the correct size and a sturdier pleated frame.
Check for gaps around the filter, open return ducts, or a second filter location you missed. Seal gaps with the correct size.
A filter change helps airflow, not every fault. See our guide to why your AC is not cooling for the next diagnostic steps.
Two problems deserve a technician rather than another filter. A soaked filter points to a condensate drain issue, which can damage the unit and surrounding structure if ignored. Mold in the compartment, or a persistent musty smell with a fresh filter, may mean coils or ductwork need professional cleaning — a filter cannot fix contamination downstream of it. Our guide to cleaning AC coils at home covers what is safe to do yourself.
Frequently Asked Questions
Which way does an HVAC air filter go in?
With the airflow arrow pointing toward the furnace or air handler — the direction air travels into the unit. From the side, the arrow points sideways toward the unit; from below, it points up.
What size HVAC filter do I need?
Read the size printed on your old filter’s frame, such as 16x25x1 (length by width by thickness in inches), and buy that exact nominal size. If the print is illegible, measure the slot and buy the closest standard size that fits snugly.
What MERV rating should I choose?
Most homes do best with MERV 8 to 11; MERV 13 suits allergy or pet households if the manual allows it. Never exceed your system’s maximum MERV — an overly dense filter restricts airflow and can damage equipment.
Can I run my HVAC without a filter while I buy a new one?
No. Without a filter, dust coats the blower and coils directly, reducing efficiency and risking expensive damage. Keep a spare on hand so the system is never without one.
What if my home has more than one filter?
Some homes have a filter behind every return grille, plus one at the unit. Check every return vent, replace them all at once, and note each size — they are not always identical.
Do It Today — It Takes Ten Minutes
If you have never changed your filter, or are unsure when it was last changed, do it today: pull the old one out, read its size, and put a fresh pleated filter in with the arrow toward the unit. Airflow often improves the same day.
Then make it a habit: keep two spare filters on the shelf, write the size on a label inside the filter door, and set a recurring reminder to check it. Ten minutes, a few times a year, protects the most expensive equipment in your home — and the air your family breathes through it.