27 Vanity Ideas Bedroom DIY That Are So Good, You’ll Wonder Why You Didn’t Try Them Sooner
So you’ve got a bedroom, a little DIY spirit, and a vanity dream that won’t quit? Same here. I’ve been obsessed with cute, clever, actually doable vanity setups for a while now. And trust me if you’ve ever tried to do your makeup while hunched over your dresser under a single lightbulb, you know why a solid bedroom DIY vanity matters.
Whether you’re working with a tight budget, zero extra space, or just want something a little more you, these 27 Vanity Ideas Bedroom DIY options will totally change your game. Spoiler: some are genius-level hacks, others are just plain adorable. Let’s get to it.
1. Floating Vanity Shelf

A floating vanity shelf is perfect when you’re tight on space but still want a functional glam zone. This idea works wonders because it gives the illusion of more room, and you can customize it to fit any wall. It’s sleek, minimal, and super easy to clean around. With no bulky legs in the way, it also keeps the area feeling airy and modern. Approximate cost is $40–70, making this a cheap and practical solution.
Pro Tips:
- Use heavy-duty wall anchors for better support.
- Choose a shelf depth of 10″ to hold essentials.
- Mount a round mirror above for a clean look.
- Add LED strips underneath for a glow-up.
- Pick a stool that tucks in completely.
2. Repurposed Desk Vanity
Turning an old desk into a vanity is a genius move, especially if you love saving money and recycling. This idea is best because desks already come with built-in storage, and you can style the top however you want. It feels personal and adds character to your bedroom setup. Approximate cost is $0–60, depending on what you already own, making it a very cheap DIY.
Pro Tips:
- Sand and repaint the desk to match your room.
- Add drawer organizers for makeup and tools.
- Use a freestanding mirror to avoid wall damage.
- Keep a lamp or sconce nearby for extra light.
- Add a cozy chair with back support.
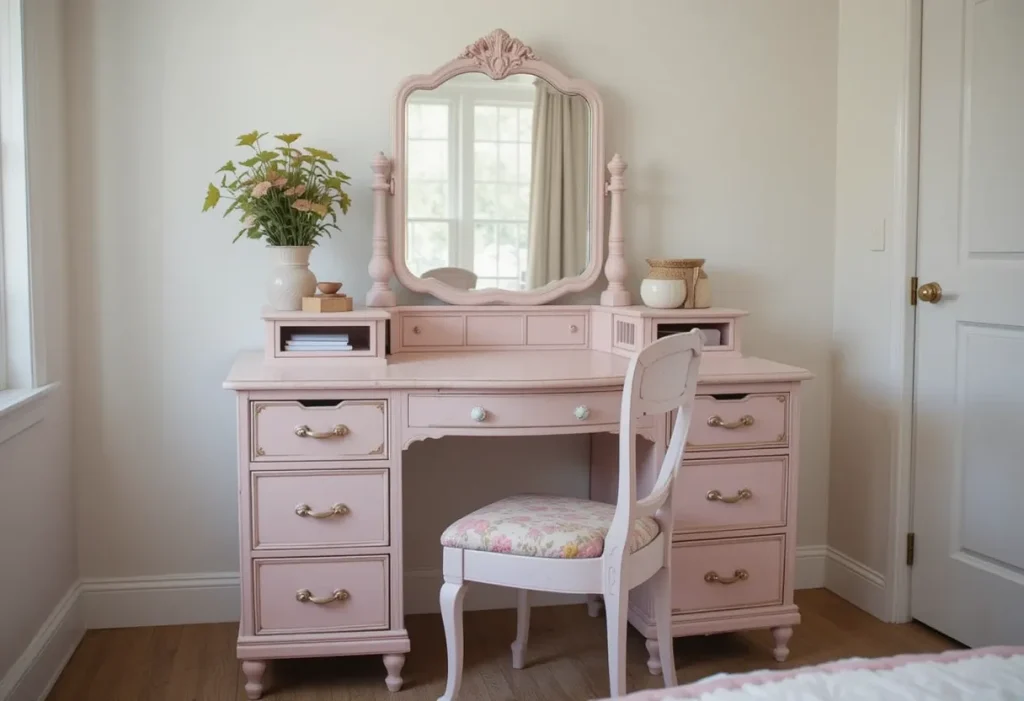
3. Vintage Dresser Makeover
A vintage dresser vanity is best when you want storage and style rolled into one. This DIY adds that nostalgic charm you won’t find in big-box furniture. With deep drawers and solid construction, it’s both functional and pretty. Approximate cost is $50–100, making this a mid-range but very rewarding project.
Pro Tips:
- Replace the knobs with crystal or brass hardware.
- Use peel-and-stick wallpaper on drawer fronts.
- Set up a tabletop mirror with lighting.
- Add velvet trays to organize jewelry.
- Keep decor minimal to let the dresser shine.
4. IKEA Hack Vanity
An IKEA hack vanity is perfect for anyone who wants a custom feel without the custom price. It’s the best option when you need flexibility and don’t want to commit to a full furniture piece. Pairing drawer units with a tabletop gives you pro-level storage. Approximate cost is $120–200, so it’s more expensive but worth every dollar.
Pro Tips:
- Use Alex drawers for max storage.
- Add contact paper for a luxe finish.
- Mount LED lights around the mirror.
- Use drawer trays to separate items.
- Label drawers for quick access.
5. Corner Vanity Nook
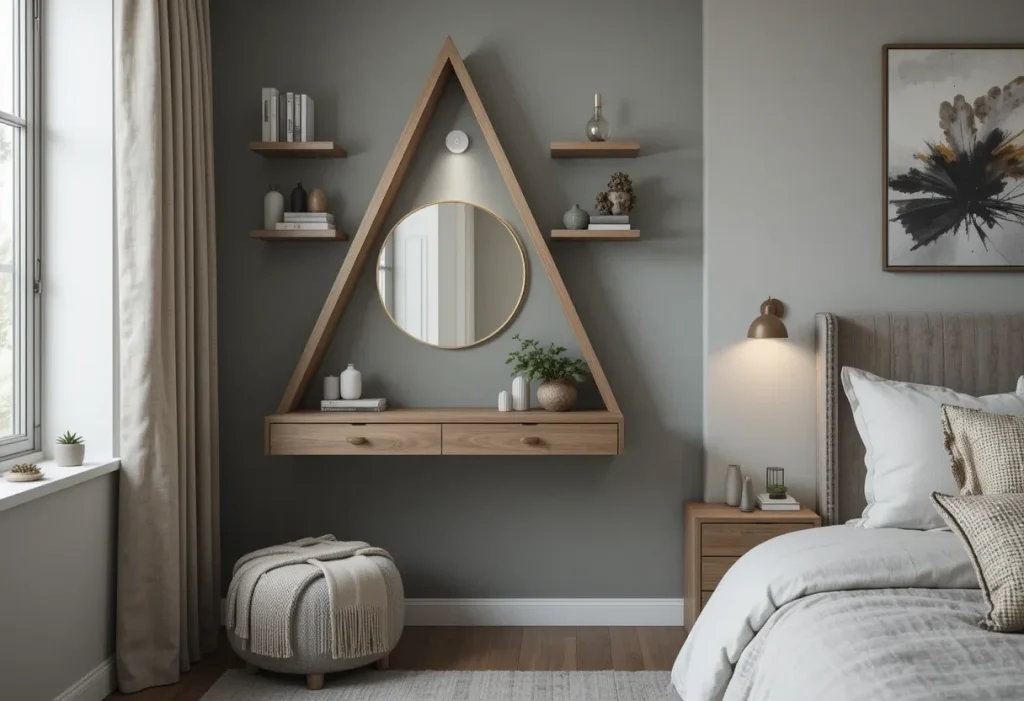
Corner vanity nooks are best when you’re working with a small bedroom and want to use every inch smartly. This idea transforms unused corners into productive glam stations. It feels intimate and efficient without taking over the room. Approximate cost is $40–80, making this a cheap and creative fix.
Pro Tips:
- Use a triangle shelf to fit the corner.
- Hang a small mirror with a light frame.
- Add wall shelves for extra storage.
- Pick a small ottoman for seating.
- Keep decor soft to enhance coziness.
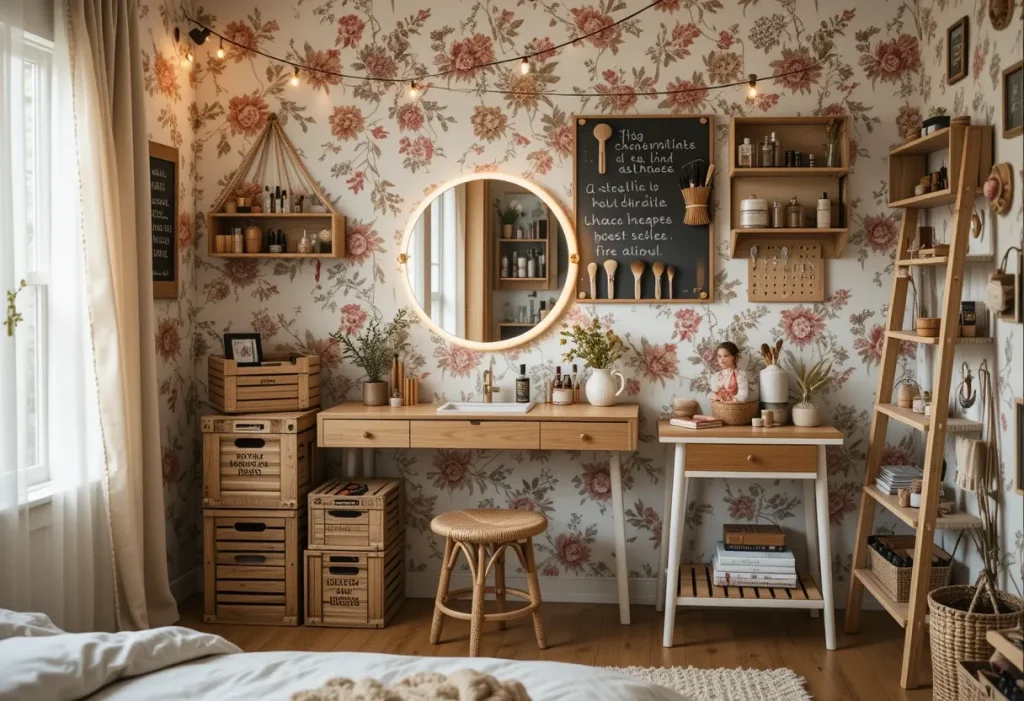
6. Crate Stack Vanity

A crate stack vanity is one of the most budget-friendly and fun DIYs you can do. It works best when you want open storage and a rustic vibe. Stacking crates allows you to adjust height and configuration to your liking. Approximate cost is $30–50, making it a super cheap and flexible solution.
Pro Tips:
- Paint or stain crates for a polished look.
- Anchor the stack for safety.
- Use the top crate for daily essentials.
- Add baskets inside for tidy storage.
- Hang a mirror directly above the stack.
7. Closet Vanity
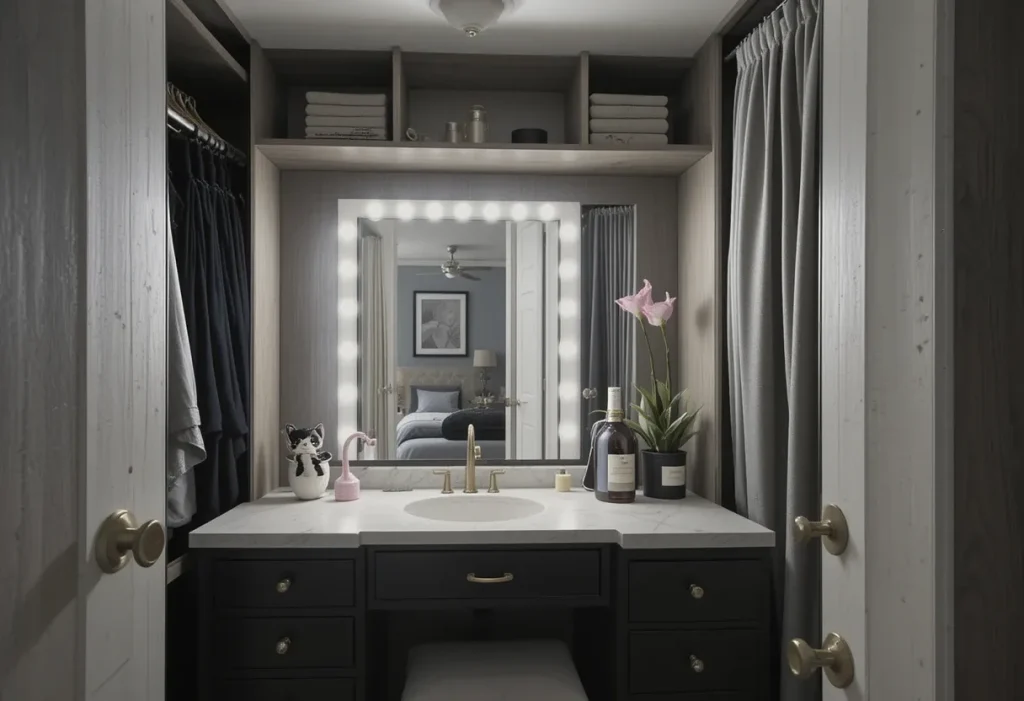
Using closet space for a vanity is a game-changer when you want privacy and a hidden setup. This idea is best because it lets you declutter your bedroom while giving your beauty tools a permanent home. You get a full setup without sacrificing square footage. Approximate cost is $60–150, making it moderately priced and space-saving.
Pro Tips:
- Install a shelf and mirror inside the closet.
- Add battery-operated lights for brightness.
- Use drawers or bins to stay organized.
- Hang a curtain if you want easy access.
- Keep it clutter-free to maximize space.
8. Makeup Cart Vanity
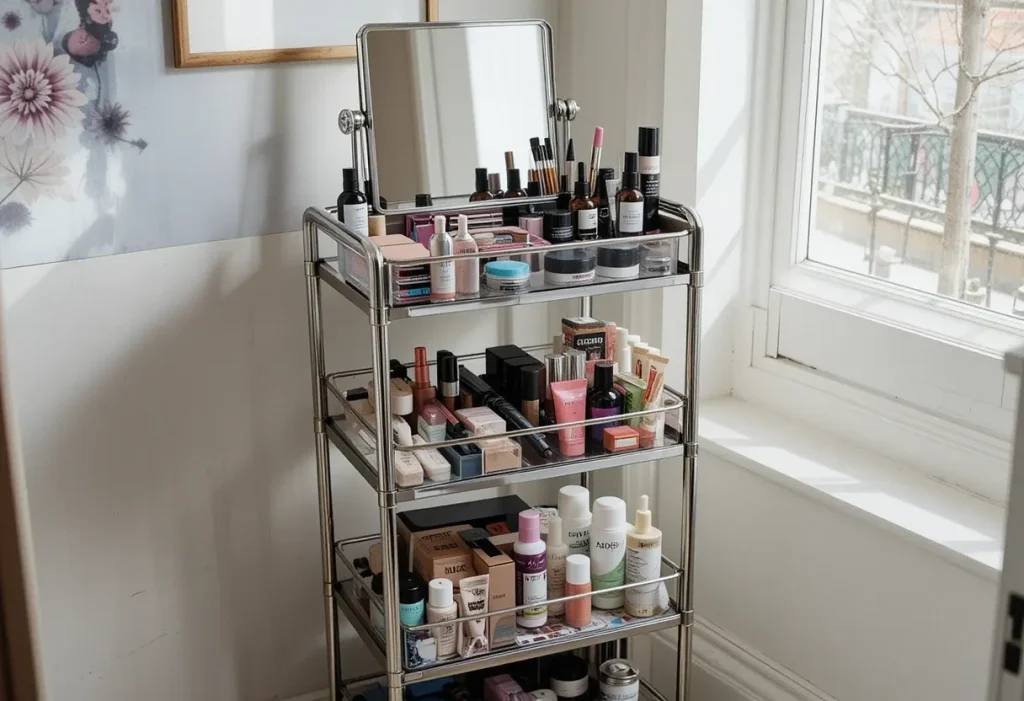
A rolling makeup cart vanity is great for small or shared spaces. It’s best because you can move it around, store it easily, and take it where the light is. It gives you total flexibility with minimal effort. Approximate cost is $30–70, which is very cheap and functional.
Pro Tips:
- Choose a three-tier cart for more storage.
- Store everyday items on the top shelf.
- Add labels to each tier for organization.
- Roll it near a window for natural light.
- Keep a small foldable mirror on top.
9. Window View Vanity
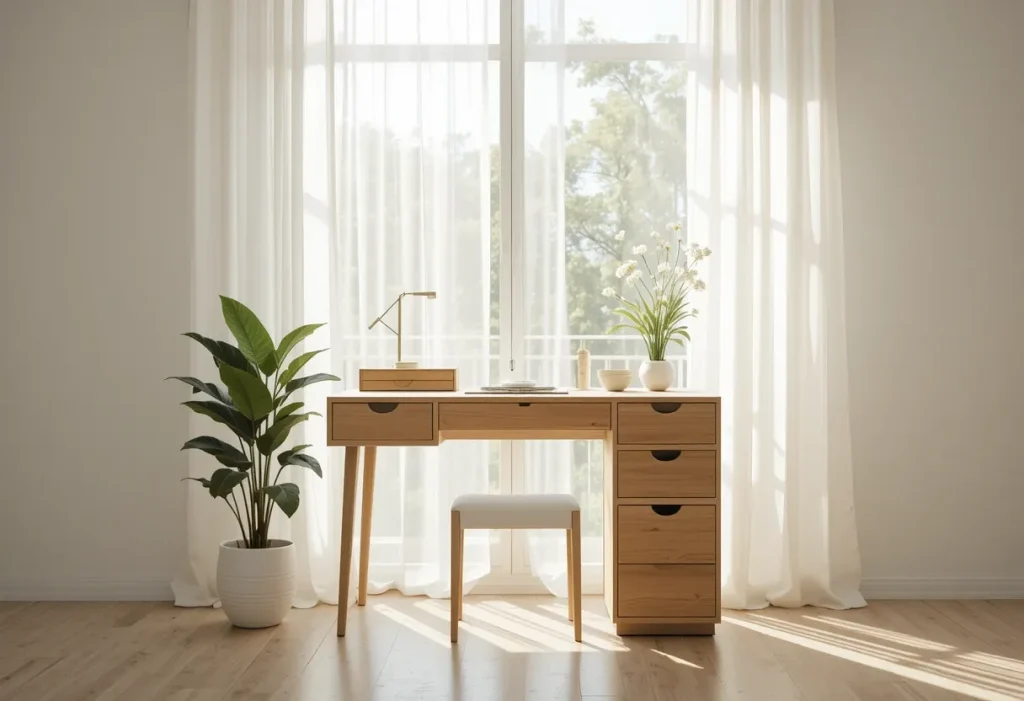
A window view vanity is a dream setup for anyone who loves natural light. It’s best because the daylight helps you apply makeup flawlessly and keeps the space feeling fresh. Bonus: the view keeps things relaxing. Approximate cost is $0–100, depending on what you have, so it can be free or moderately priced.
Pro Tips:
- Use sheer curtains to diffuse sunlight.
- Position the table directly in front of the window.
- Keep reflective surfaces minimal to avoid glare.
- Store items in stackable drawers.
- Add a live plant for freshness.
10. Wall-Mounted Pegboard Vanity
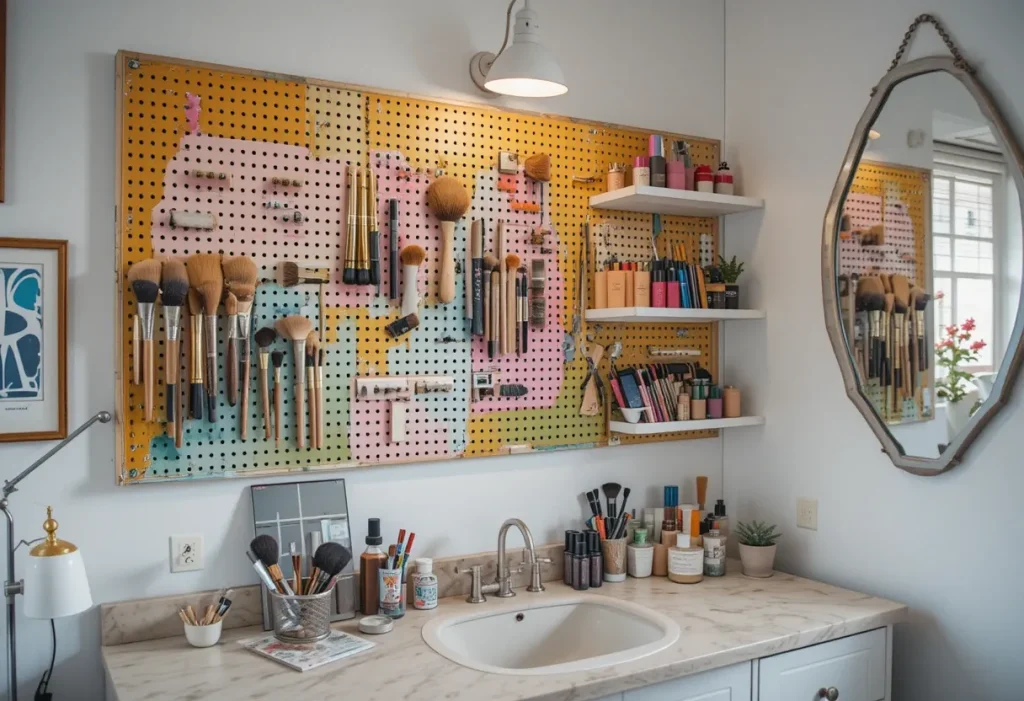
Pegboard vanities are perfect when you need serious organization with a side of style. This idea is best because you can customize hooks and shelves to suit your routine. Everything is visible, tidy, and within reach. Approximate cost is $30–60, making this a very cheap and efficient setup.
Pro Tips:
- Paint the pegboard to match your decor.
- Use S-hooks for brushes and tools.
- Add floating shelves for storage.
- Hang the mirror at eye level.
- Use a magnetic strip for metal items.
11. Chalkboard Vanity Wall
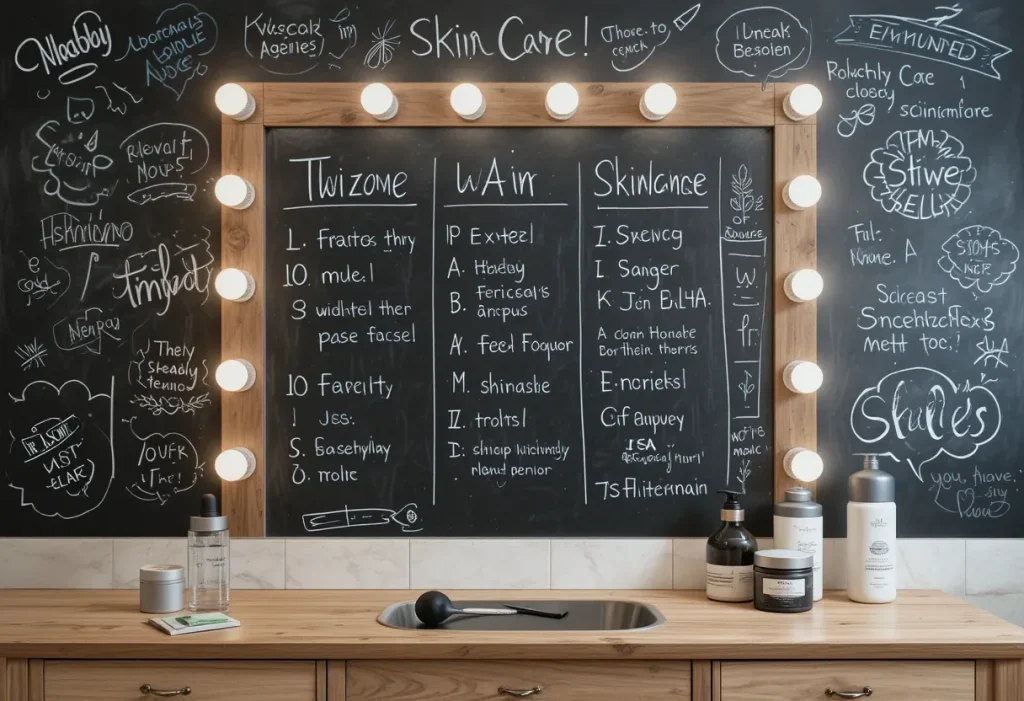
A chalkboard vanity wall brings a playful and personal touch to your setup. It’s best because it lets you jot down routines, quotes, or just doodle while waiting for your setting spray to dry. It keeps the area fun and interactive. Approximate cost is $20–40, so this is definitely a cheap and cheerful DIY.
Pro Tips:
- Use liquid chalk for clean lines.
- Draw your weekly skincare routine.
- Decorate with motivational quotes.
- Add a ledge for chalk storage.
- Keep a cloth nearby to wipe it down.
12. Boho Rattan Setup
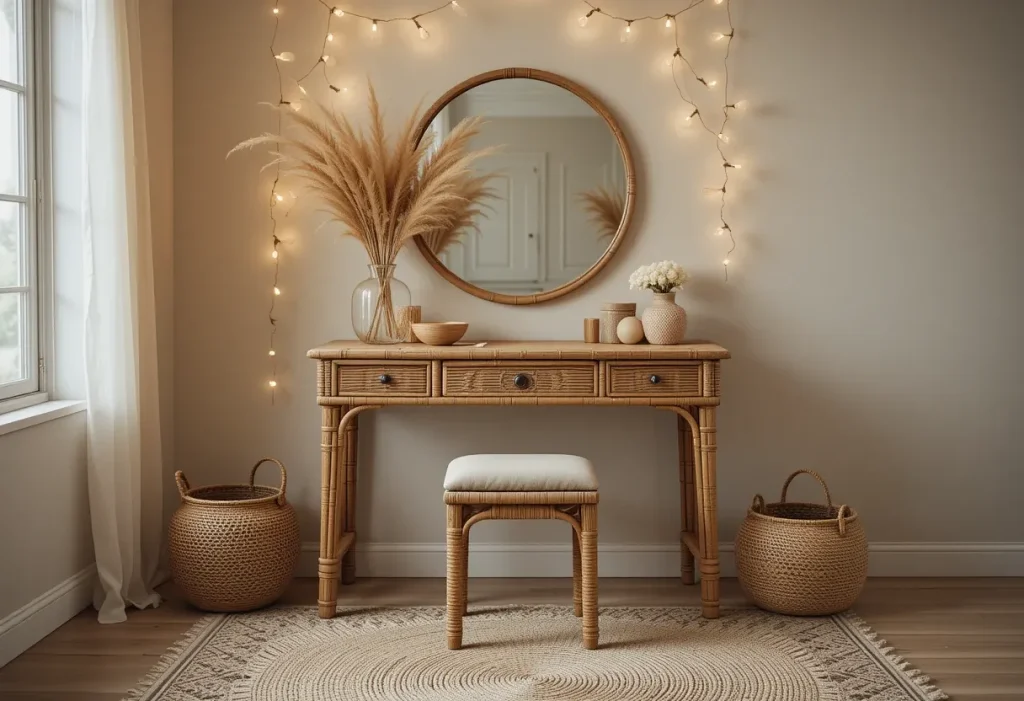
Boho rattan vanity setups are best when you’re after a relaxed, earthy vibe. The textures add depth, and it feels effortlessly stylish. You get a warm, inviting space that doubles as a decor statement. Approximate cost is $80–150, which makes this a more expensive but worthwhile DIY.
Pro Tips:
- Pair with a round mirror.
- Use warm-tone string lights.
- Add a woven basket for storage.
- Decorate with dried pampas grass.
- Layer a soft rug underneath.
13. Minimalist Mirror + Stool Combo
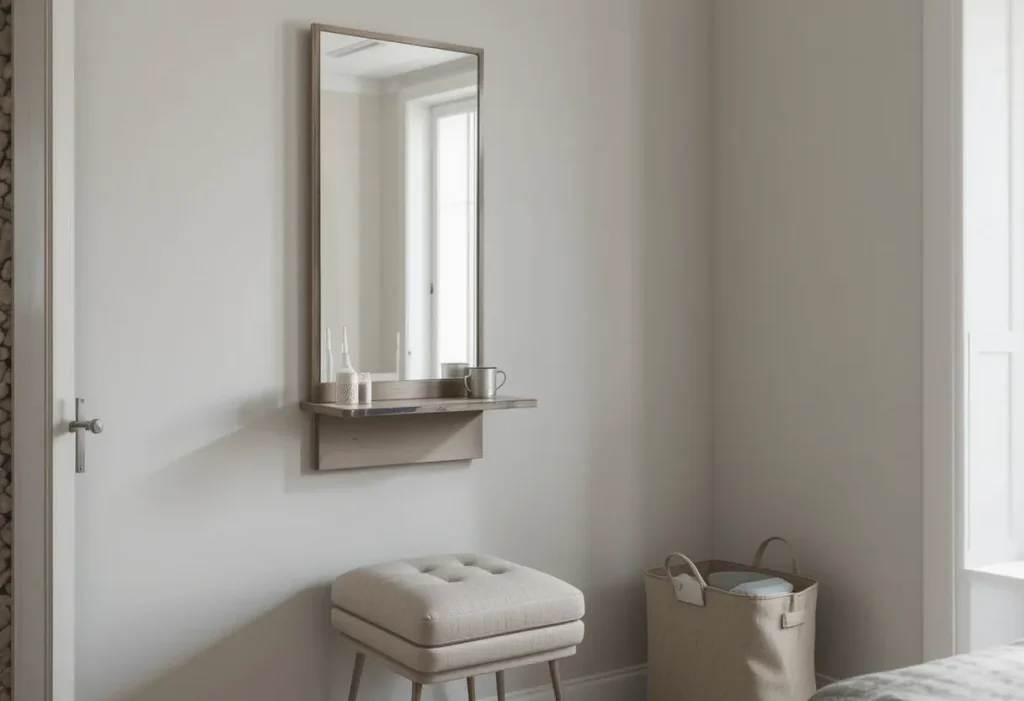
This setup is best when you want simplicity without sacrificing style. It’s compact, quick to set up, and does exactly what it needs to. With no clutter or fuss, it keeps your space looking clean and intentional. Approximate cost is around $50, making it a cheap and minimalist win.
Pro Tips:
- Pick a mirror with a small shelf.
- Use a stool with hidden storage.
- Keep a rolling bin nearby for extras.
- Choose neutral tones for calm vibes.
- Add a small tray for daily essentials.
14. Industrial Pipe Vanity
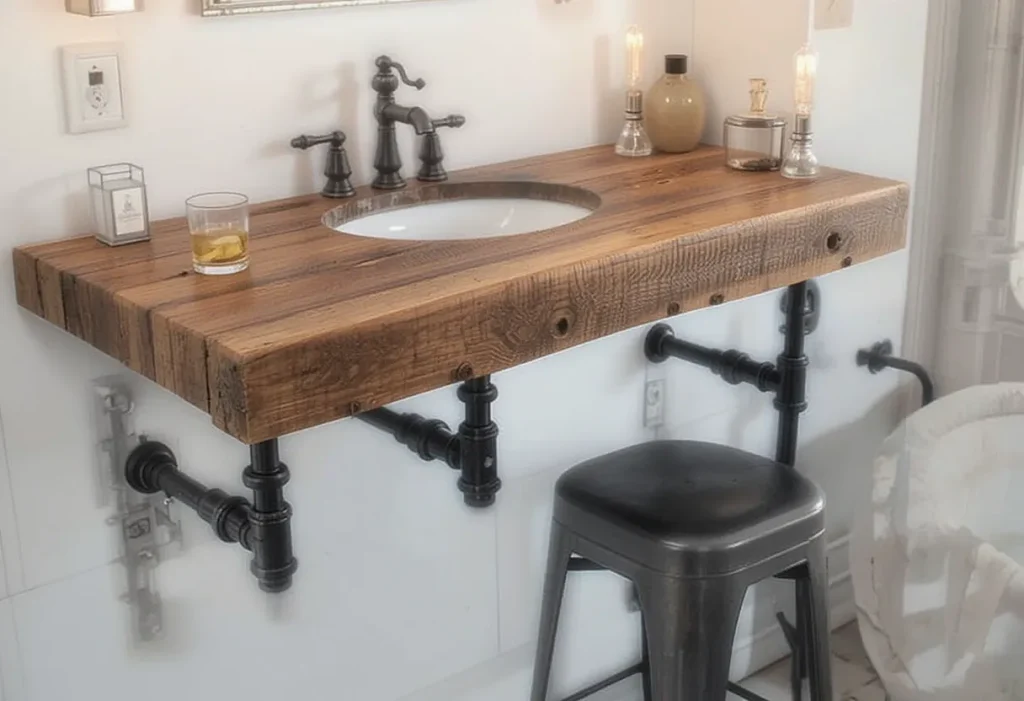
An industrial pipe vanity is best when you want a bold, edgy look with strong structure. The mix of raw metal and wood gives it character and durability that’s hard to beat. It’s sturdy enough to last and totally stands out visually. Approximate cost is $70–$120, making it a moderately expensive but statement-worthy setup.
Pro Tips:
- Use black or brass pipes for a modern touch.
- Choose thick reclaimed wood for the top.
- Add Edison bulb lighting for vibe.
- Anchor it securely to the wall.
- Pair it with a sleek metal stool.
15. Drawer Vanity Tray
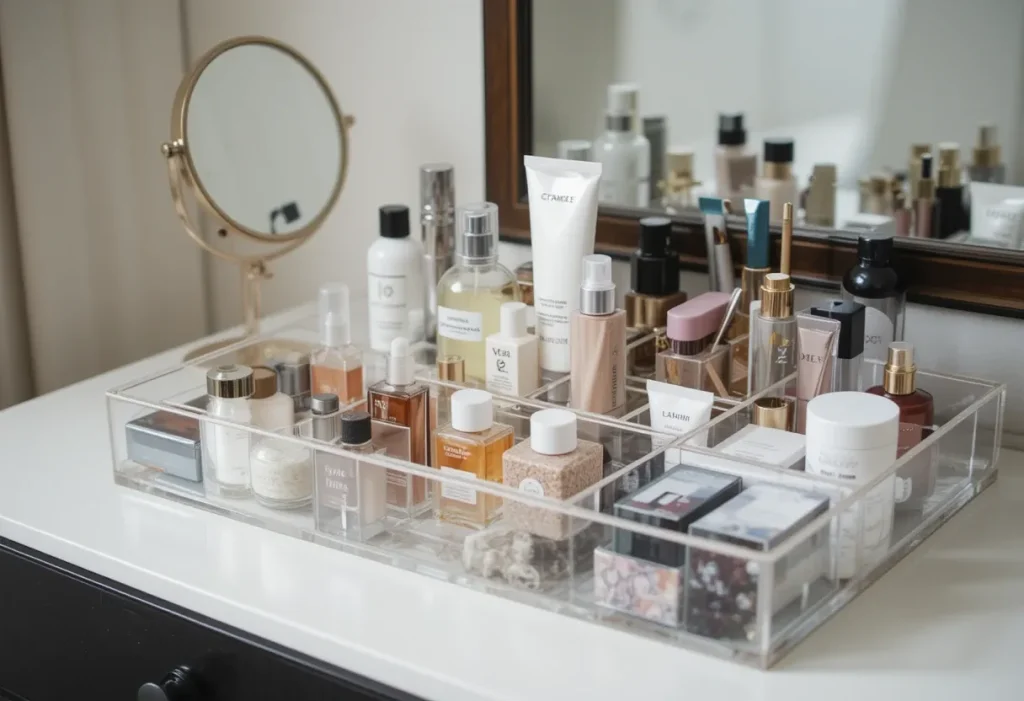
A drawer vanity tray setup is perfect when you’re low on space but high on essentials. It’s best because it allows you to organize everything neatly on top of your dresser without buying anything new. You get function without the fuss. Approximate cost is $10–$30, making it one of the cheapest ways to feel fancy.
Pro Tips:
- Use acrylic trays for easy cleaning.
- Separate items by category.
- Rotate items seasonally.
- Add a mini mirror on a stand.
- Keep it clutter-free to stay efficient.
16. Ladder Shelf Vanity

A ladder shelf vanity is best when you want vertical storage that doubles as decor. The angled structure gives it visual interest, and you can use every tier to store and display your beauty items. It’s functional and looks boutique-chic. Approximate cost is $60–$100, so it’s a moderate investment that pays off.
Pro Tips:
- Store everyday items on middle shelves.
- Hang jewelry from side rails.
- Add baskets to lower shelves.
- Top it with a round mirror.
- Style with plants or books for charm.
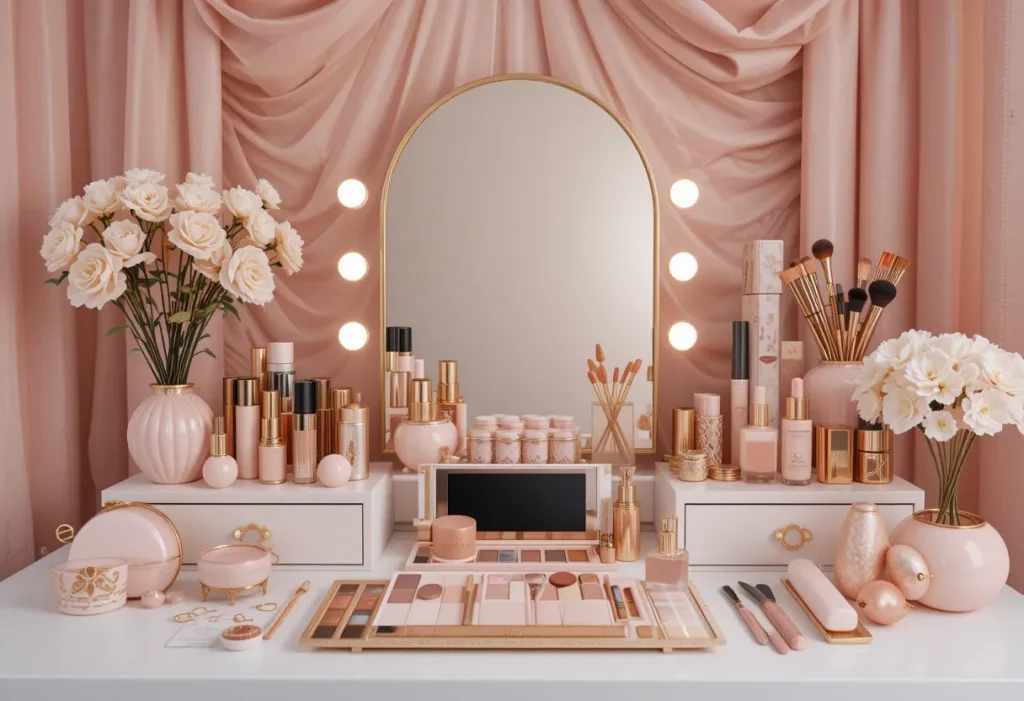
17. DIY Hollywood Mirror Vanity
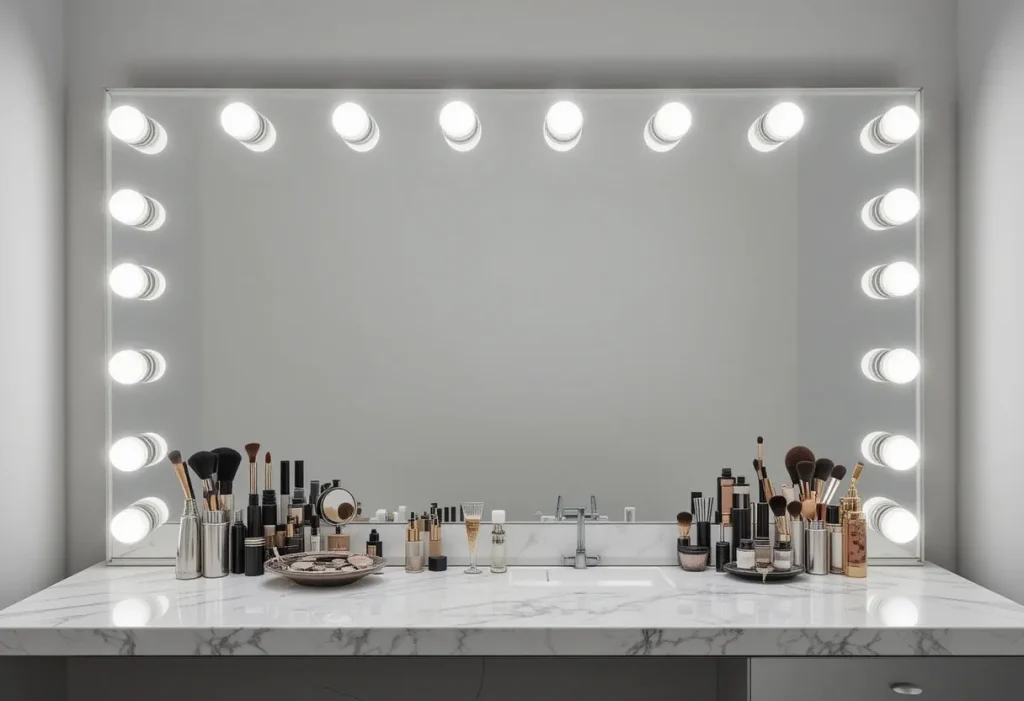
This one’s best when you want your space to scream glam and give pro makeup artist vibes. Installing light bulbs around your mirror upgrades the look and functionality instantly. The lighting is unbeatable for makeup and selfies. Approximate cost is $80–$150, so it’s on the expensive side but totally worth it.
Pro Tips:
- Use dimmable bulbs to control brightness.
- Plan out bulb placement before installation.
- Keep cords hidden for a clean finish.
- Mount mirror at your seated eye level.
- Add a sleek tabletop for products.
18. Bookshelf Turned Vanity
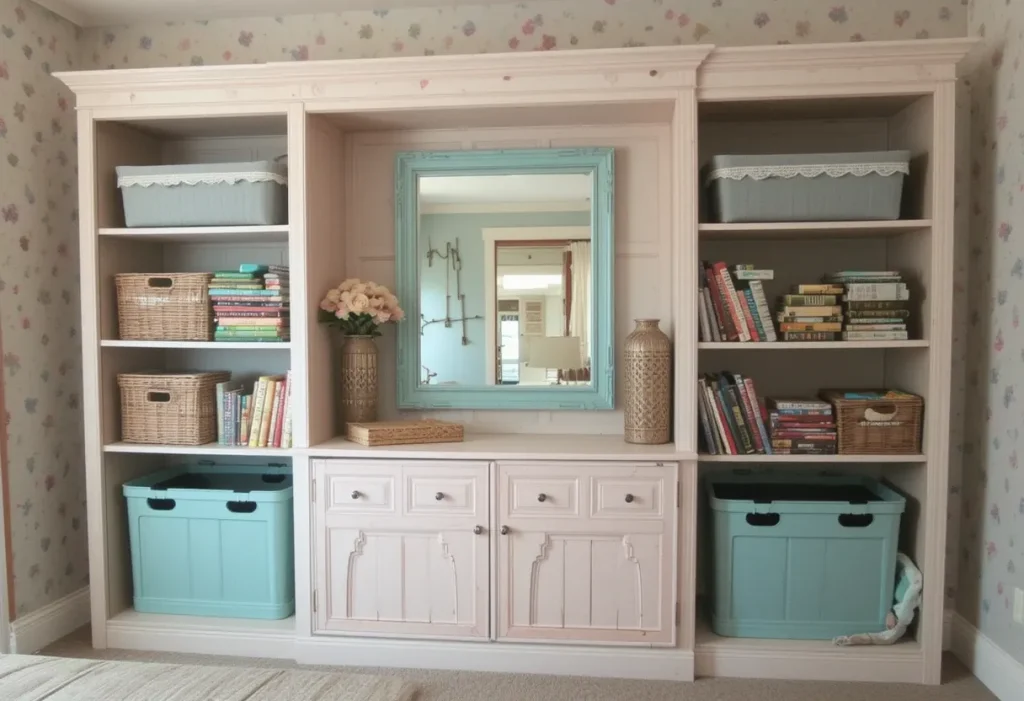
A bookshelf turned vanity is ideal when you want hidden storage and an unexpected twist. Bookshelves already come with tiers that can easily become homes for your beauty tools and skincare. It’s structured, customizable, and cute. Approximate cost is $40–$70, making this a cheap and practical setup.
Pro Tips:
- Use baskets or bins to hide clutter.
- Mount a mirror to the middle shelf.
- Store perfumes and brushes on top.
- Use LED puck lights for each shelf.
- Paint it to match your room theme.
19. Wallpapered Backdrop Vanity

A wallpapered vanity wall is best when you want to create a visual statement with minimal effort. The bold print or texture defines your vanity zone instantly. It makes even the simplest setup feel custom and styled. Approximate cost is $40–$80, a mid-range solution that delivers big visual impact.
Pro Tips:
- Use peel-and-stick wallpaper for flexibility.
- Match mirror frame to pattern color.
- Keep the vanity furniture simple.
- Add gold or brass accents.
- Use good lighting to highlight the wallpaper.
20. DIY Makeup Brush Holder Wall

This setup is best for the ultra-organized type who wants quick access to tools. Mounting jars or cups on the wall keeps brushes clean, accessible, and off your surface. It’s practical, tidy, and creative. Approximate cost is $15–$30, making it a very cheap yet satisfying project.
Pro Tips:
- Use mason jars or tin cans.
- Mount on a wood plank or directly to wall.
- Group by brush type.
- Clean brushes weekly to maintain.
- Add labels for extra order.
21. Upcycled Window Frame Vanity
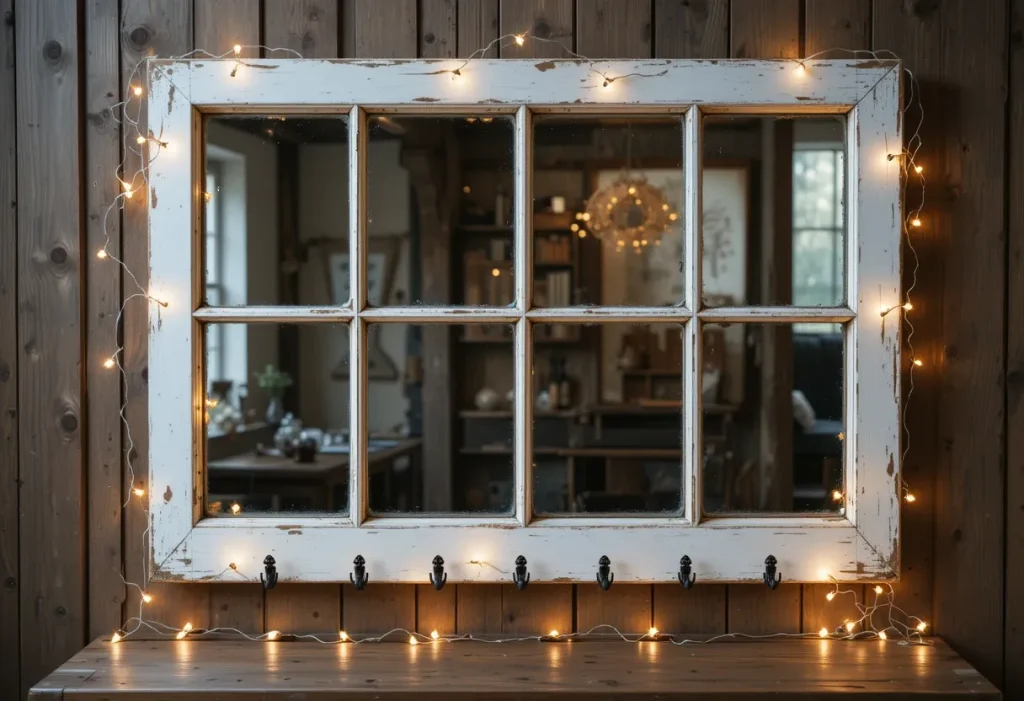
An upcycled window frame vanity is best for vintage lovers who want charm without cost. Using an old window as your mirror or decorative frame gives off serious cottagecore vibes. It’s unique, sentimental, and artsy. Approximate cost is $20–$50, making it a cheap and whimsical choice.
Pro Tips:
- Use mirror glass to replace panes.
- Sand and repaint the frame.
- Add hooks for jewelry storage.
- Mount above a rustic table.
- Add fairy lights for softness.
22. Under-Bed Pull-Out Vanity
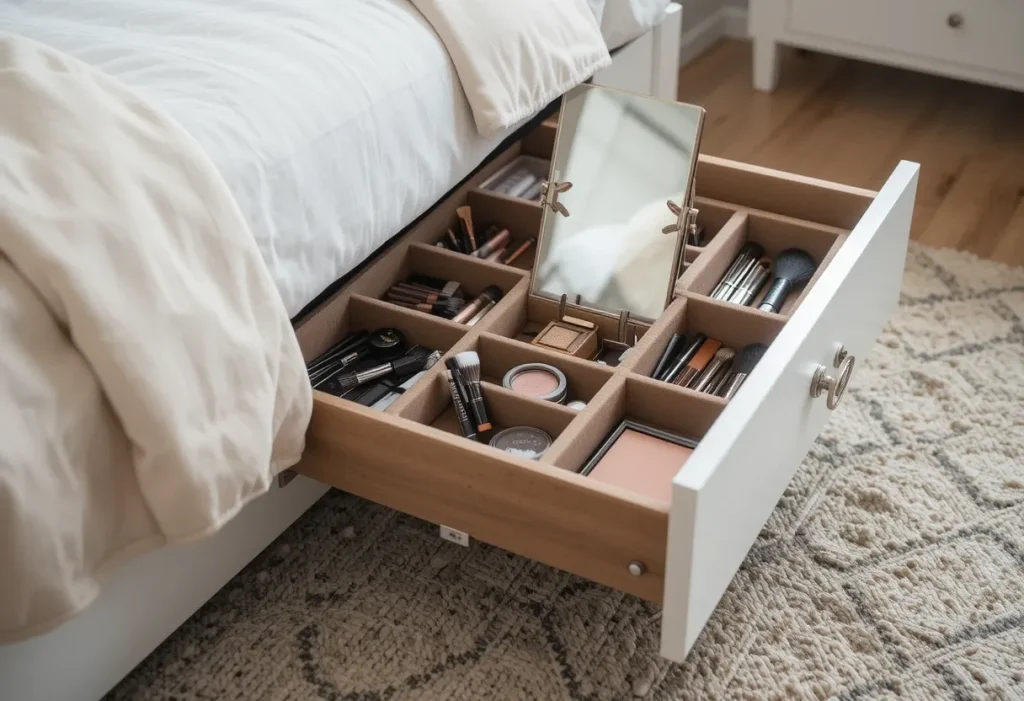
This idea is best when you’re working with limited room but want to keep your beauty setup close. Using a rolling drawer or cart under your bed hides the clutter and gives you a clean aesthetic. It’s smart, subtle, and portable. Approximate cost is $30–$60, so it’s a cheap and clever fix.
Pro Tips:
- Use felt liners to protect items.
- Choose shallow drawers for easy access.
- Store a folding mirror inside.
- Label sections clearly.
- Pull it out near natural light when using.
23. Hanging Vanity Table
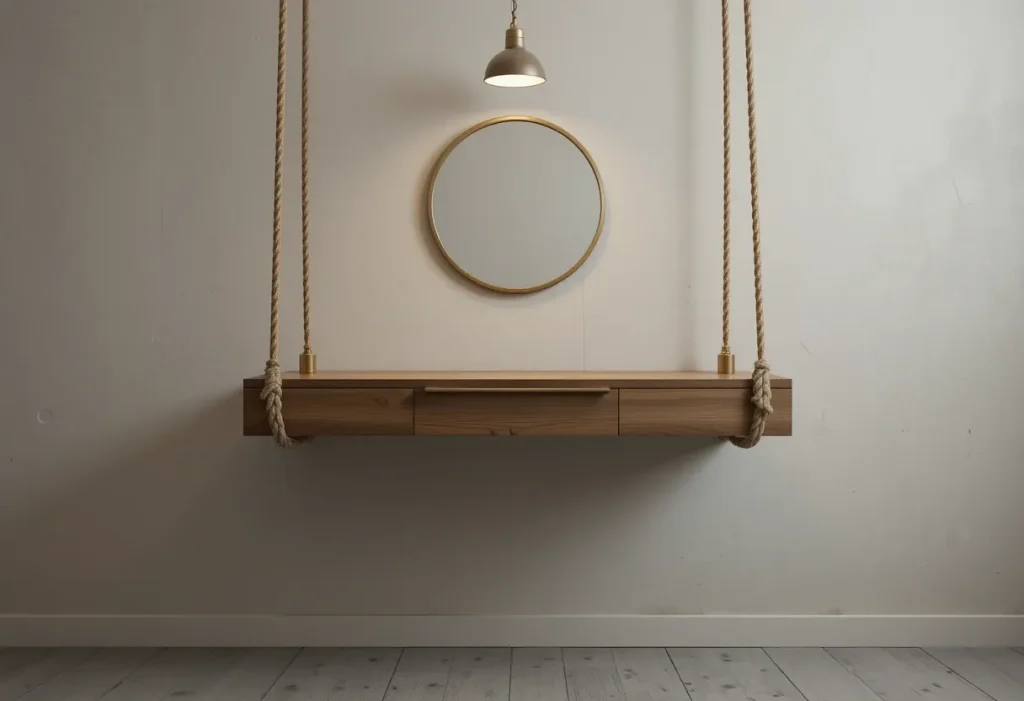
A hanging vanity is perfect when you want an edgy, minimal look that saves floor space. Suspended with rope or chains, it adds style and surprise to your room. It’s unusual and stylish without being overwhelming. Approximate cost is $50–$90, making it moderately priced and eye-catching.
Pro Tips:
- Secure anchors tightly in studs.
- Use lightweight wood to hang safely.
- Keep accessories minimal.
- Pair with a simple round mirror.
- Add one hanging pendant light above.
24. Color-Coordinated Vanity Setup
This one is best when you’re aiming for aesthetic perfection. Coordinating all your vanity items by color creates a satisfying, polished look. It’s eye-catching and helps you feel organized. Approximate cost depends on what you own, so it can range from $0–$100, cheap to mid-range.
Pro Tips:
- Choose one color family.
- Spray paint mismatched items.
- Use neutral backdrop to highlight color.
- Style with matching decor.
- Rotate colors by season.
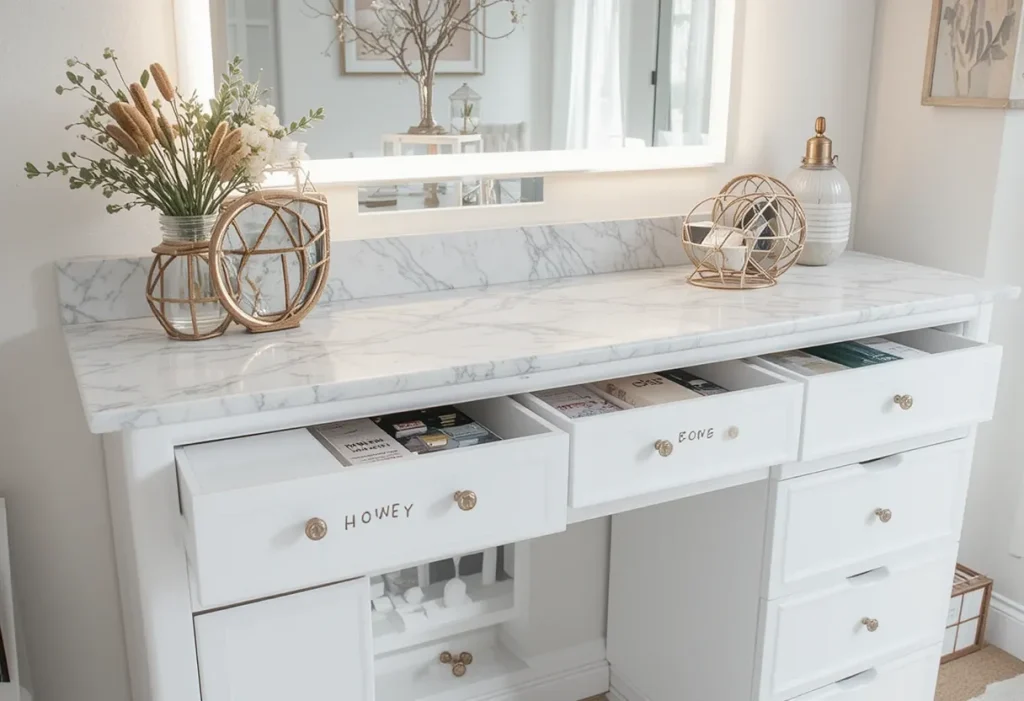
25. DIY Lighted Mirror Cabinet
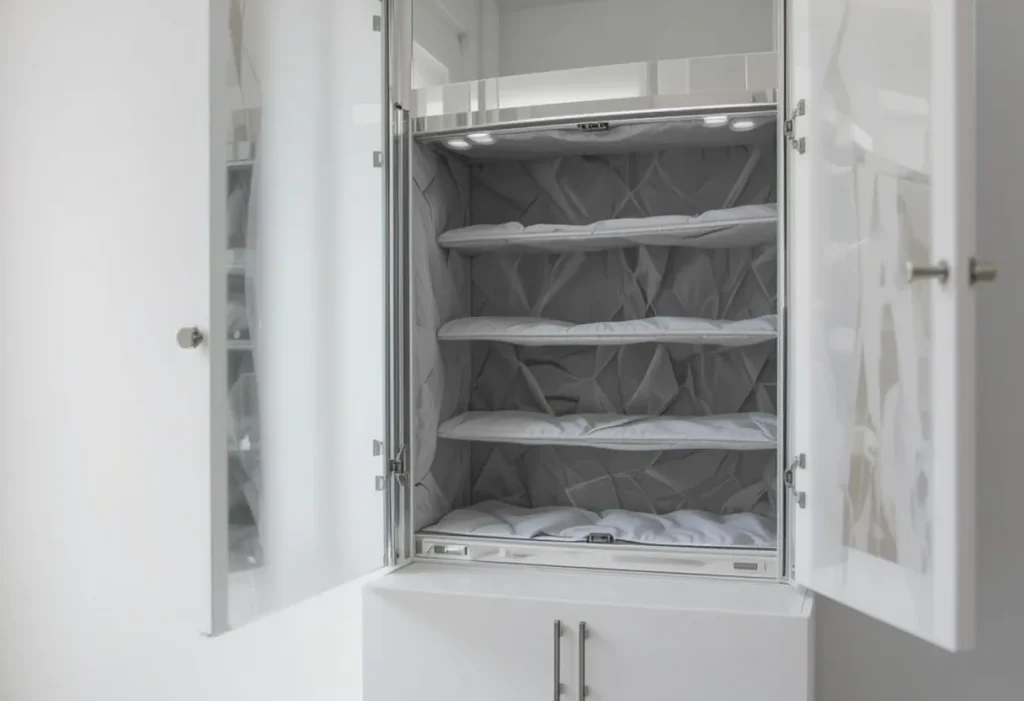
This vanity idea is best for those who love functionality and hidden storage. Combining a mirror with a built-in cabinet lets you store your routine in style. It’s clean, modern, and extremely practical. Approximate cost is $100–$200, so it’s an expensive but smart investment.
Pro Tips:
- Use LED strips with a motion sensor.
- Add adjustable shelves inside.
- Keep heavy items on lower levels.
- Use magnetic latches for closure.
- Line with soft felt for elegance.
26. Picture Frame Vanity Mirror
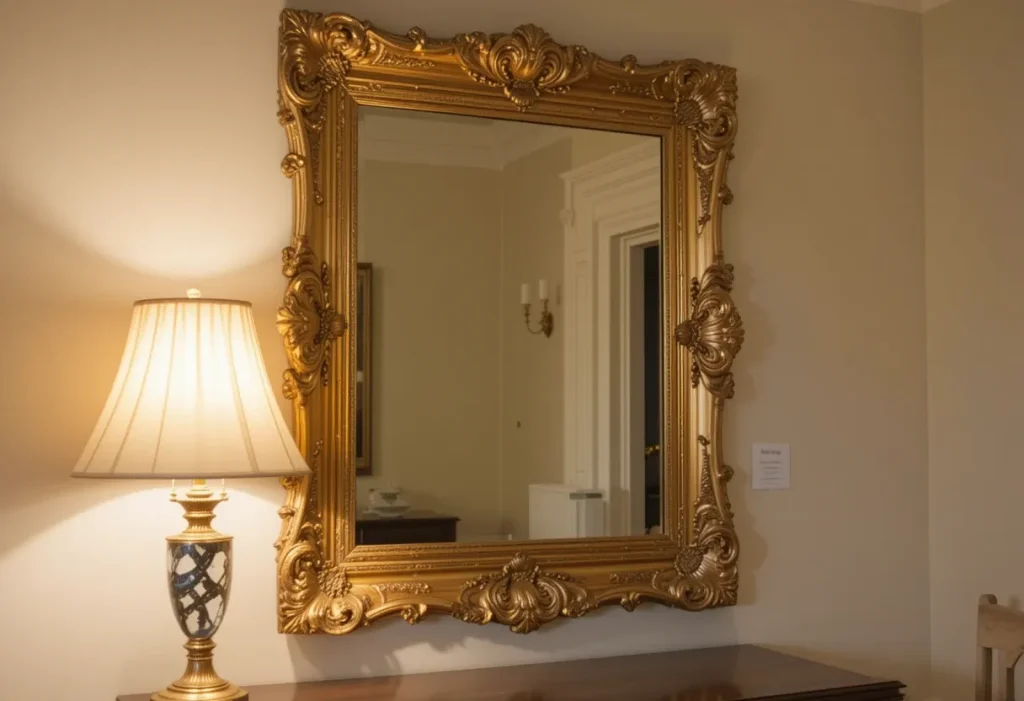
A picture frame vanity mirror is ideal for adding a touch of elegance to any setup. Transforming a large frame into a mirror feels fancy without much work. It’s simple but stylish. Approximate cost is $30–$60, making this a cheap and glamorous DIY.
Pro Tips:
- Use spray adhesive for mirror backing.
- Choose ornate or gold-toned frames.
- Mount securely with strong hooks.
- Clean with a microfiber cloth.
- Pair with a vintage lamp for effect.
27. DIY Vanity Behind Curtains
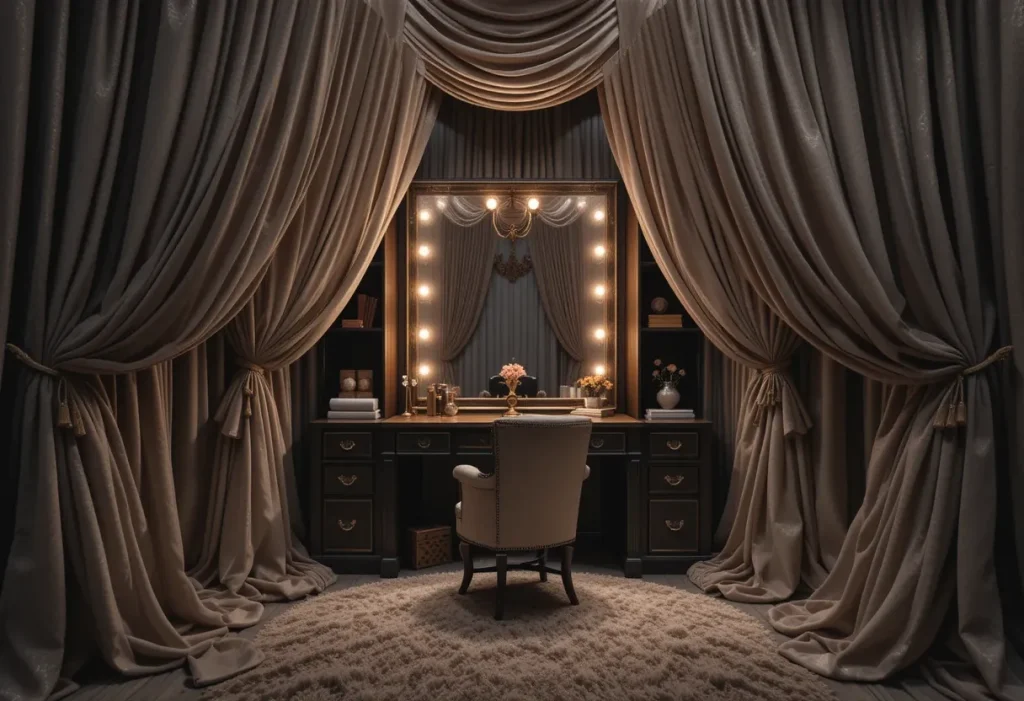
This idea is best when you want privacy and a touch of drama. Installing curtains around your vanity area lets you hide the mess and create a cozy glam nook. It’s flexible and theatrical in the best way. Approximate cost is $50–$100, making it a moderately priced and fun solution.
Pro Tips:
- Use blackout curtains for full coverage.
- Add a ceiling-mounted track.
- Place a soft rug underneath.
- Use a folding chair to tuck away.
- Hang a small chandelier inside for flair.
Final Thoughts
Building the perfect bedroom DIY vanity isn’t about money or square footage. It’s about making space for yourself (and your highlighter addiction). Whether you go full Hollywood glam or keep it cozy with a crate setup, there’s definitely something here for you.
So what’s your excuse now? 😉
Pick an idea, grab your tools, and get messy because IMO, a DIY vanity you love is way better than any store-bought basic.